Configuring IDE#
No specific environment is required in the laboratories. You can choose any program installed on the faculty’s computers and even (for advanced users) if you really miss your favorite program, try a local installation. However, a good code editor or IDE (Integrated Development Environment) should have several features that are very useful when solving lab tasks. These include:
- program syntax highlighting
- error reporting and highlighting
- hints and autocompletion (except for AI-based tools such as Copilot, these are prohibited)
- autoformatting on save
Several programs are installed on the lab computers that (when properly configured) meet all these requirements. These include (in alphabetical order):
- CLion
- Emacs
- Geany
- QtCreator
- Vim
- Visual Studio Code
Below there are two IDE configuration tutorials, but it is worth noting that this is only an example dictated by the author’s personal preferences. All of the programs listed above (with proper configuration) should work equally well, so if you already have a favorite tool, you can stick with it (although it is worth giving QtCreator a try, a very nice IDE ~ author’s personal note).
First step - creating a sample project#
As the first step in the configuration process for any of the following guides, we should create a sample project that we will later load/open using the selected IDE.
We create a simple project. Create a new folder with a name of your choice (in our case, it will be test) and place two files inside it: main.c and Makefile:
main.c:
#include <stdio.h>
#include <stdlib.h>

int main()
{
    printf("Hello world\n");
    return EXIT_SUCCESS;
}Makefile:
all: main
main: main.c
	gcc -fsanitize=address,undefined -Wall -Wextra -Wshadow -Werror -o main main.c
.PHONY: clean all
clean:
	rm main
In the project folder, we also create a configuration file for clang-format; during the laboratory classes, this file will be included in the starter repository. Important! This file starts with a dot, so it is hidden by default.
.clang-format:
BasedOnStyle: Google
IndentWidth: 4
ColumnLimit: 120
BreakBeforeBraces: Allman
BreakConstructorInitializersBeforeComma: false
AllowShortIfStatementsOnASingleLine: false
AllowShortBlocksOnASingleLine: false
AllowShortLoopsOnASingleLine: false
IncludeBlocks: Preserve
PointerAlignment: Left
InsertNewlineAtEOF: true
Now we can proceed to configuring the selected IDE.
Configuring QtCreator for laboratories#
We assume that we have already created a sample project, as described here. Then, we navigate to the newly created directory.
Now, calling make should correctly compile our small program, which after running should print Hello world.
We can now launch the QtCreator. After launching, select File->New Project. It is important to select New Project and not Open File or Project - if we simply open our main.c file, QtCreator will not know which flags we want to use to compile the program, and thus its operation may be unstable (e.g., reporting errors that do not actually exist). In the window that appears, select Import project and then Import Existing Project.

Next, we choose a name for our project (in the example, it is simply test) and the project directory from which we then add source files - in our case, main.c. After doing this, QtCreator will create a series of files named test.<extension> in the project directory and open our new project. It should look like this:

During the laboratory, these newly created files should not be added to git (the server will reject them) - this is only our local configuration; in practice, when several programmers work together, each of them can use different tools. From these files, we are now only interested in the test.cflags. In this file, we specify the compilation flags that QtCreator will use for its “smart” features, such as error reporting. It is important that the flags are the same as in the Makefile, so now you should paste there -fsanitize=address,undefined -Wall -Wextra -Wshadow -Werror.
At this point, all basic functionalities should work. As you write code, you should see a window with hints. When you make a mistake (try, for example, not adding a semicolon at the end of a line), the program will highlight the incorrect line in red.
The last step is to enable formatting on save - this will save us the hassle of calling clang-format before each commit. To do this, we need to enable the beautifier plugin. From the Help menu, click About Plugins, then find Beautifier in the list and activate it; then accept by clicking Ok. You will need to restart the IDE. In the project folder, create a configuration file for clang-format - during the lab, it will be included in the initial repository. There is a configuration file in our project directory .clang-format that we previously created.
Note that the name of this file begins with a dot - it is invisible by default. Now go to the Edit->Preferences menu and select the Beautifier section. In the General tab, check Automatic formatting on file save and select ClangFormat from the Tool menu. In the ClangFormat tab, select Use predefined style and set it to File. Accept the settings by clicking Ok.

Now, every time you save a file (Ctrl+S), it will be automatically formatted according to configuration from config file. To check if this feature works correctly, try adding a few unnecessary spaces somewhere in the program and save the file.
Your IDE is now ready for the laboratories. It is still worth spending a few minutes reviewing and adjusting various options in the settings (Edit->Preferences), especially in the Environment section, where you can configure the appearance and keyboard shortcuts. By default, QtCreator has a very convenient search engine under the shortcut ctrl+k that allows you to find various object classes (files, functions, global variables, etc.) in the project. Other options and instructions can be found in the help and documentation.
Visual Studio Code Configuration#
Before creating a project, you should first install the extensions needed for working with C/C++. To do this, launch Visual Studio Code and open the Extensions tab (keyboard shortcut: Ctrl + Shift + X).
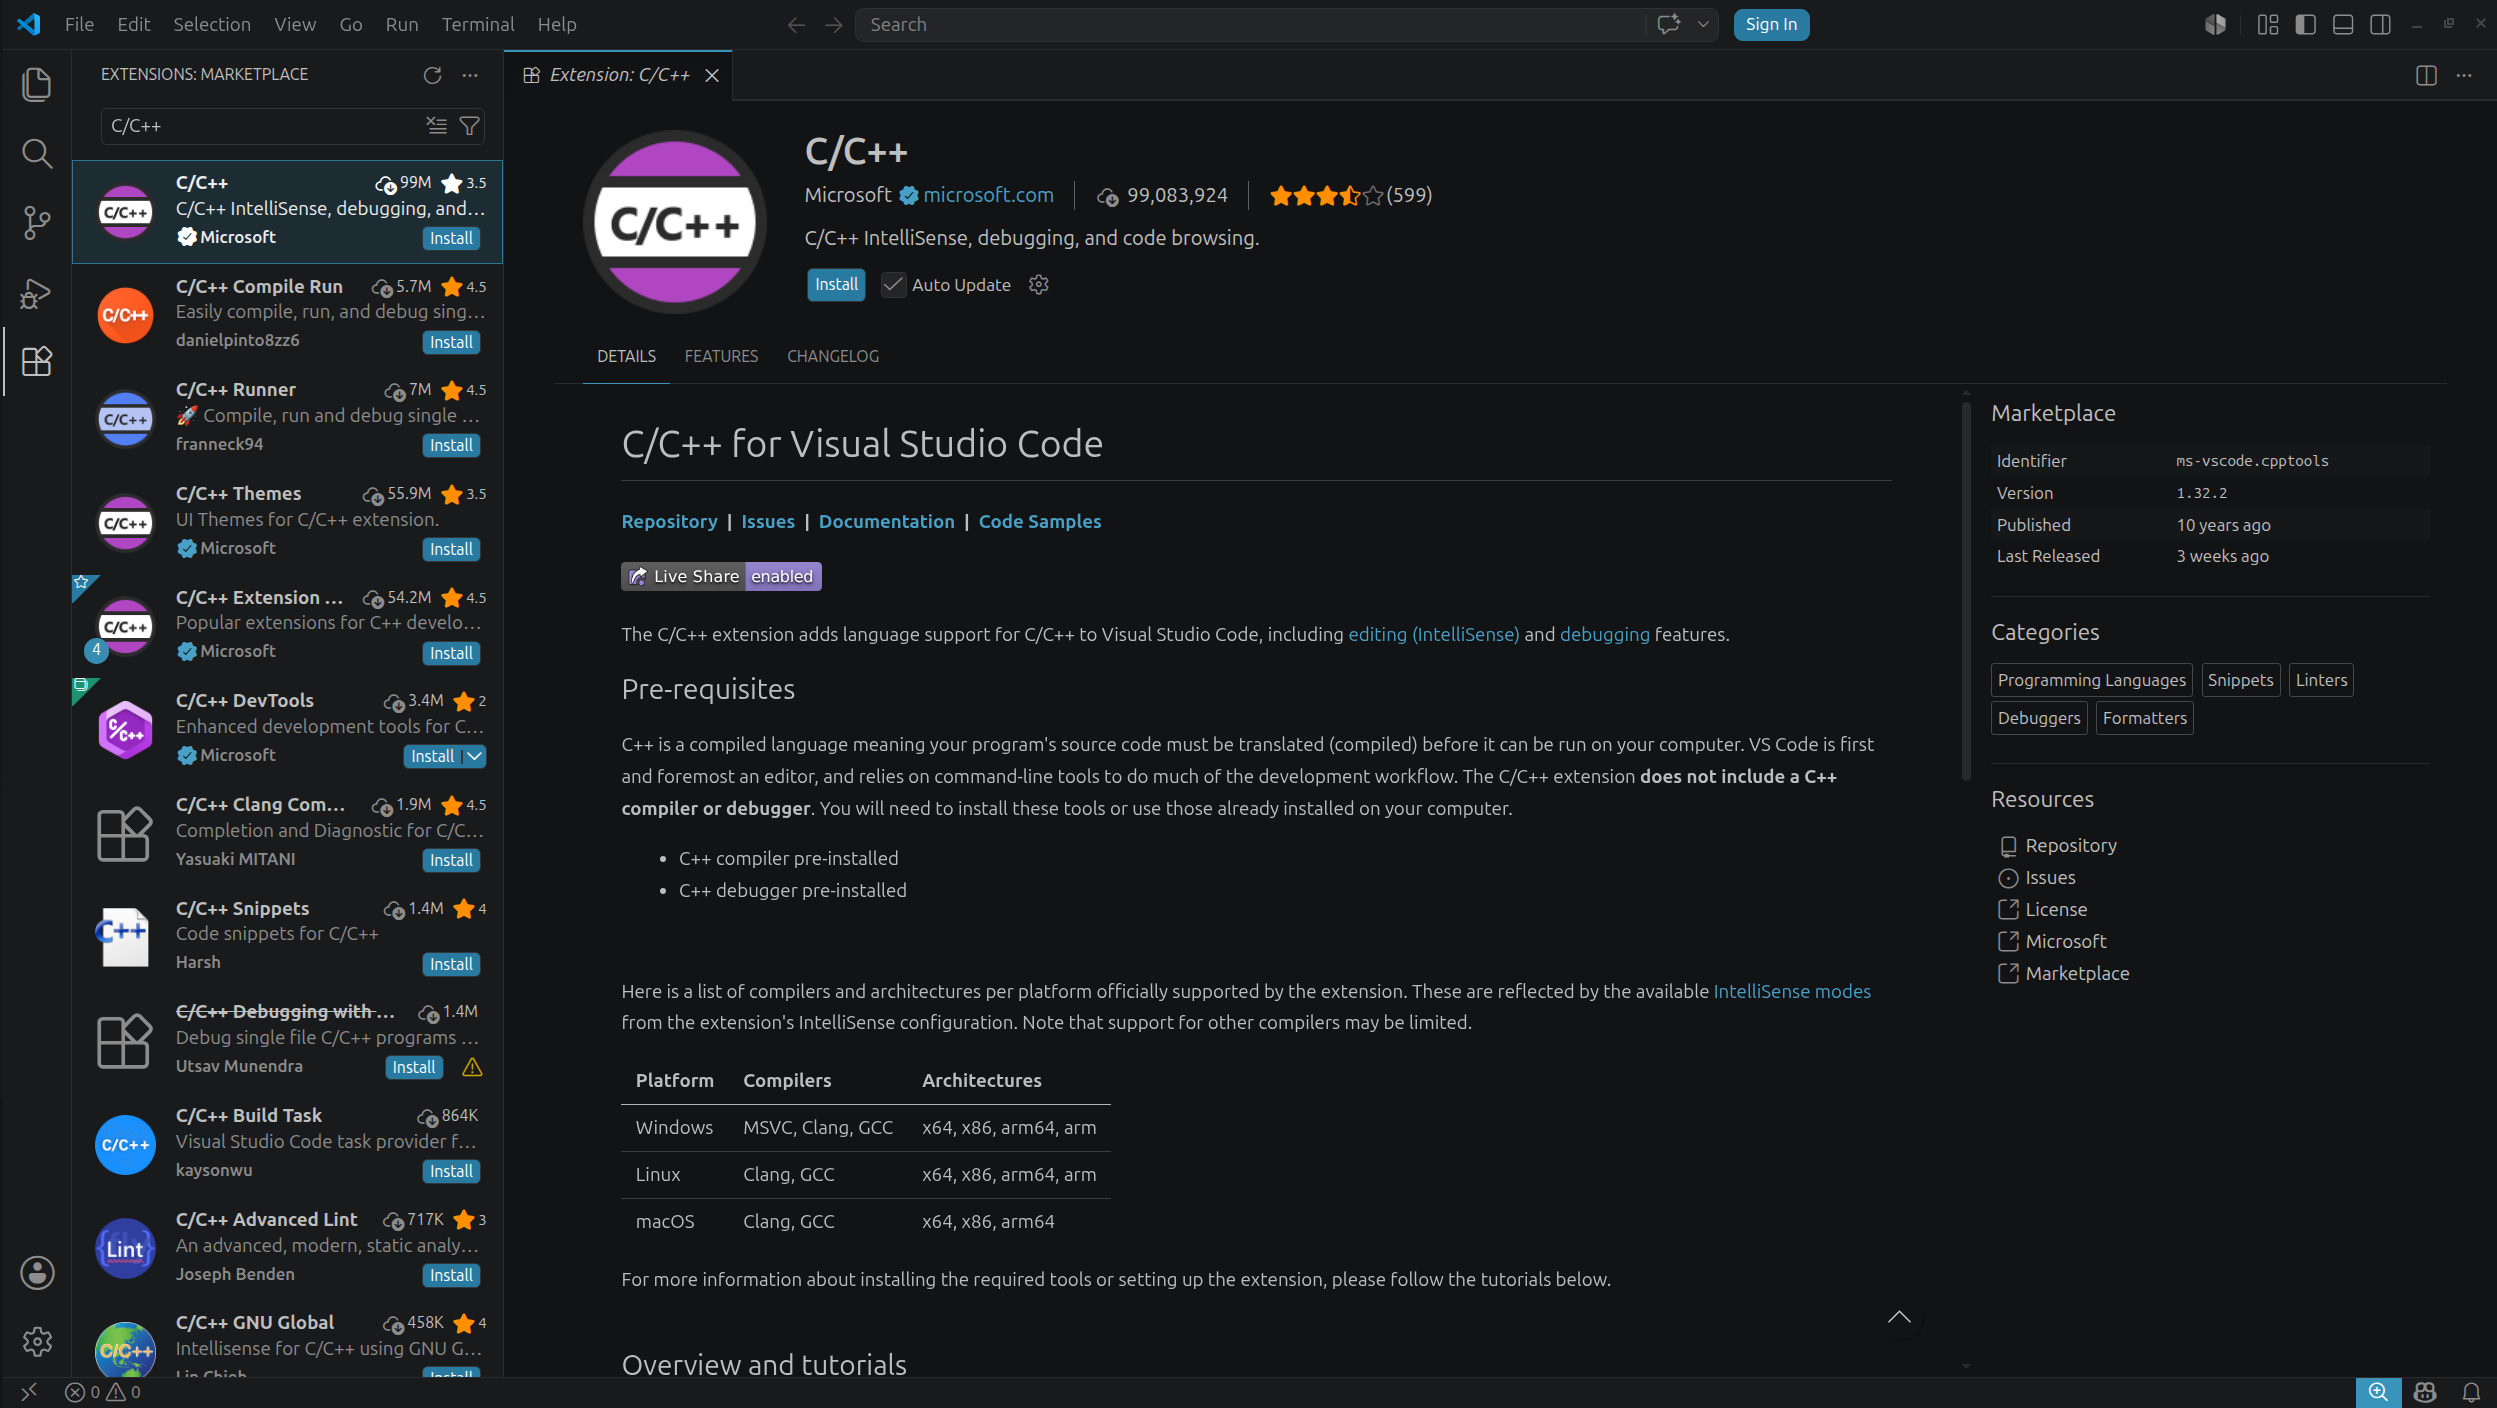
Search for the C/C++ extension (published by Microsoft; it should be the first result after searching), then click Install. The installation is automatic and restarting the editor is not required.
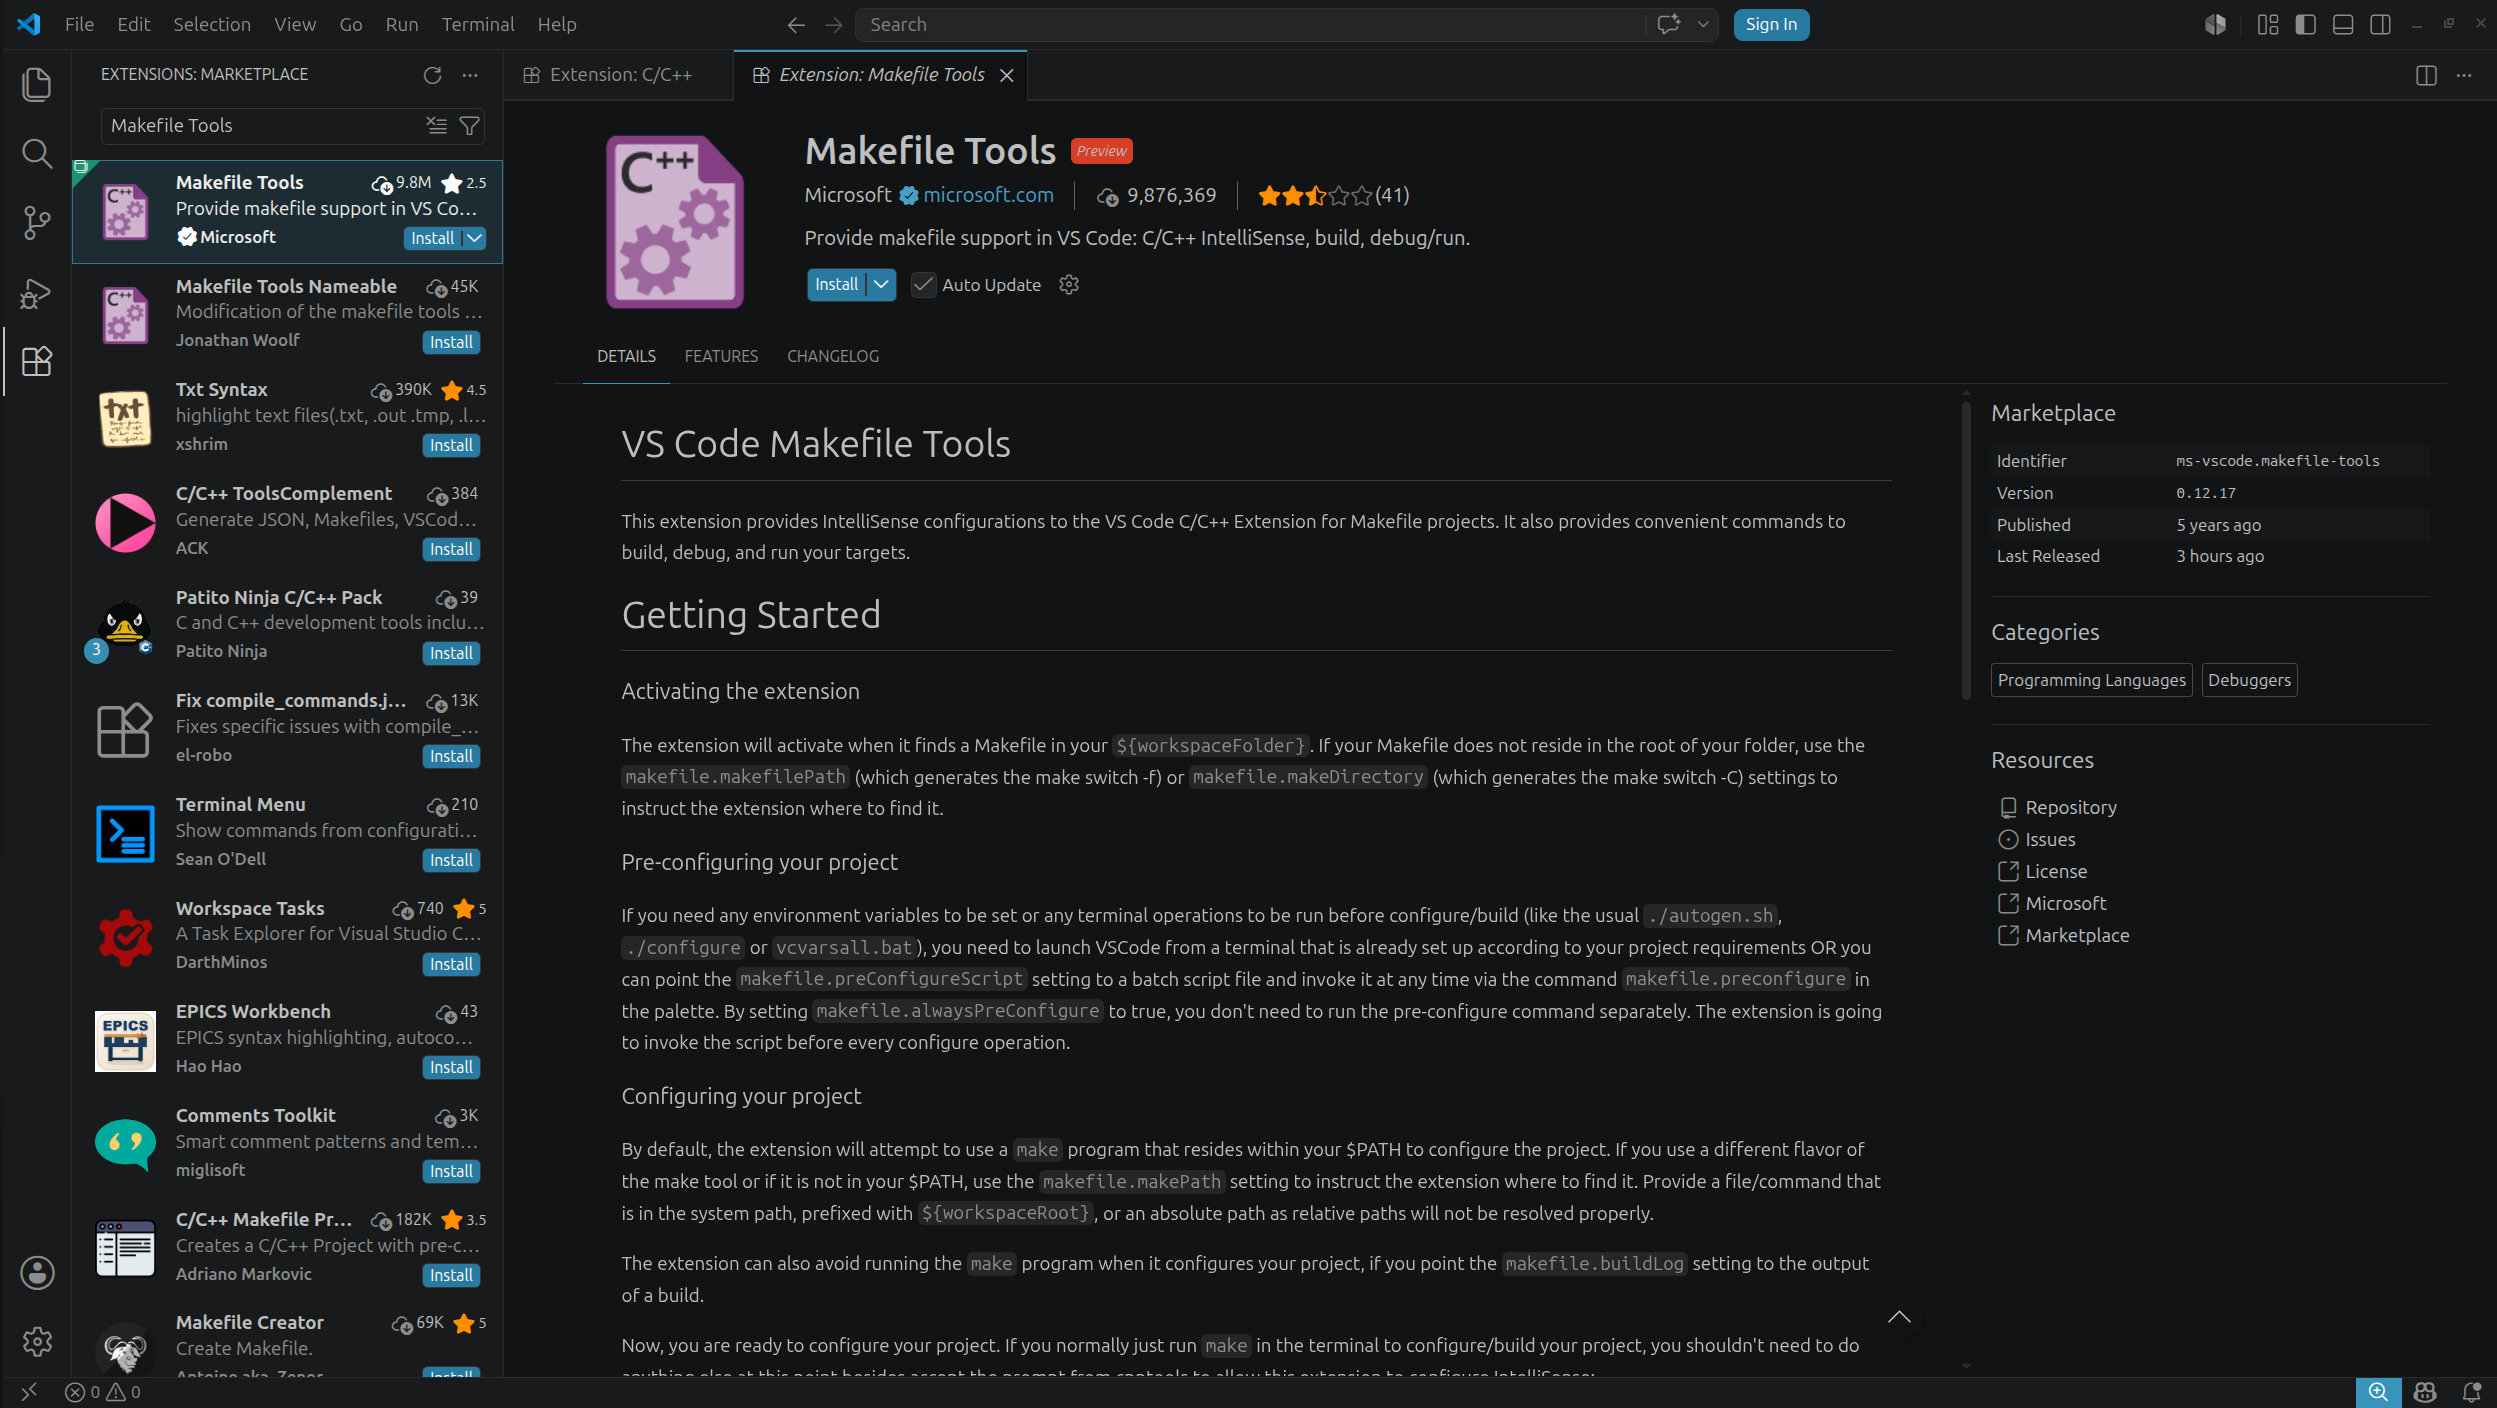
Do the same for the Makefile Tools extension (also published by Microsoft).
These are all the extensions needed for comfortable work with C code.
In Visual Studio Code, click File -> Open Folder in the upper-left corner and select the test folder that we created earlier.
With this configuration, running the make command compiles the program that prints Hello world to the standard output.
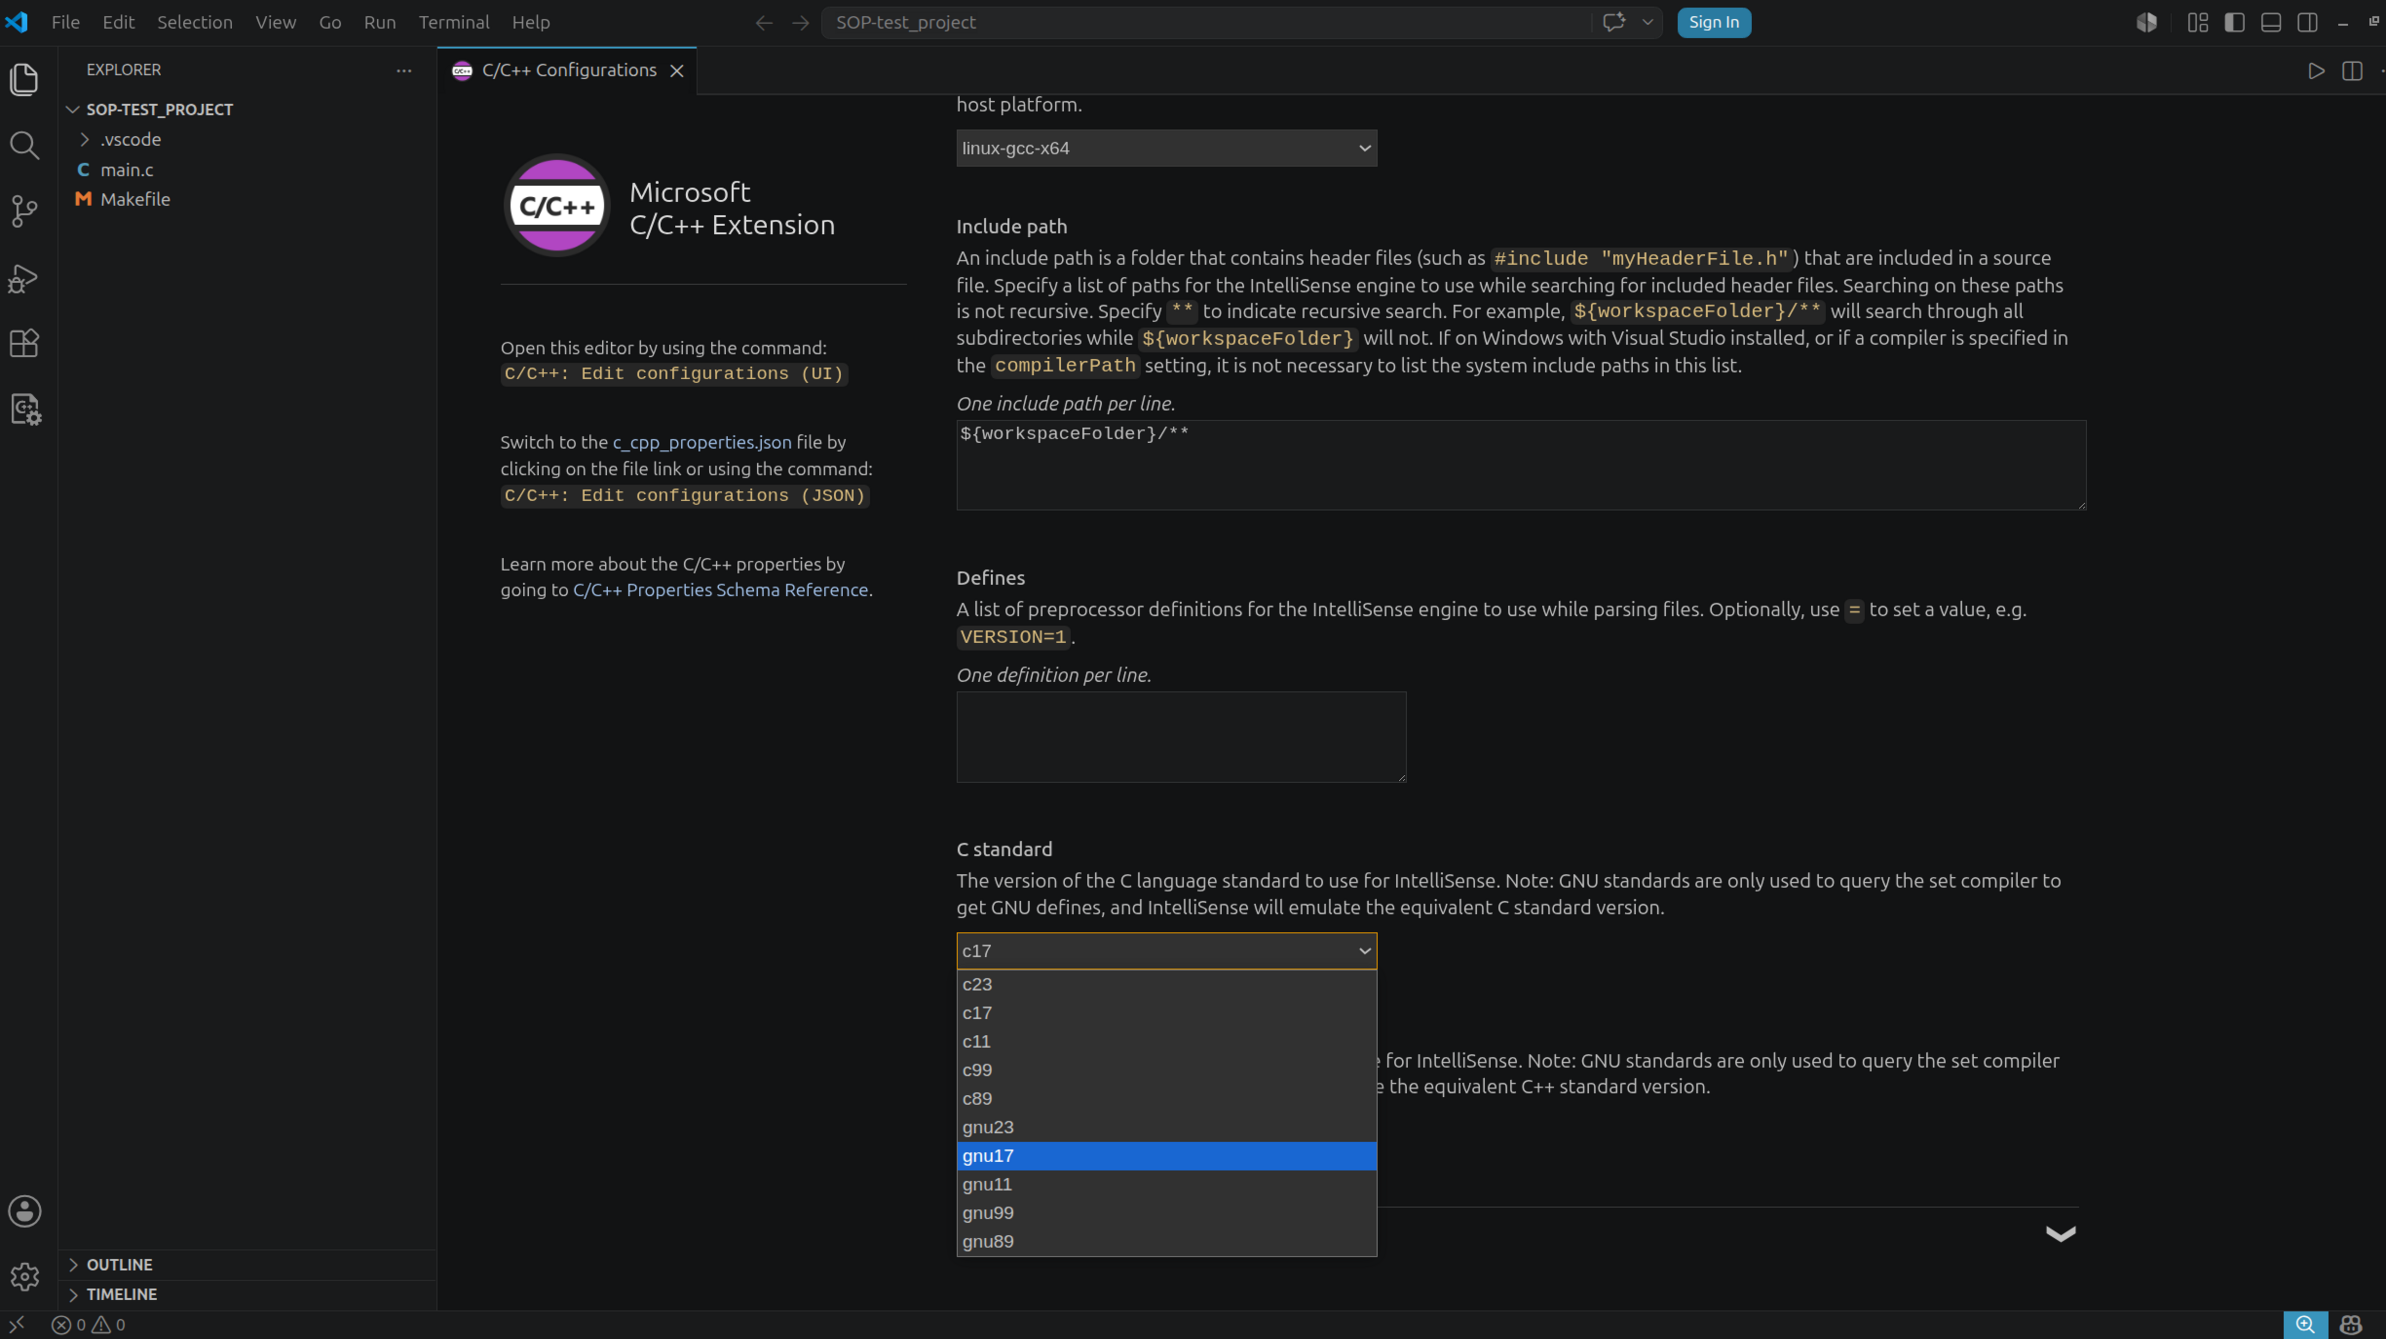
Note! A very important step is changing the default C standard used by the editor. Otherwise, the editor may mark some names as unknown even though the program compiles correctly. To fix this, change the default standard from c17 to gnu17. To do this, press Ctrl + Shift + P, type C/C++: Edit Configurations (UI), and press Enter. A page with compiler settings should appear. Scroll down to the C standard section and change the value from c17 to gnu17. It should look more or less like this:
From this point on, the editor should analyze and highlight the code correctly.
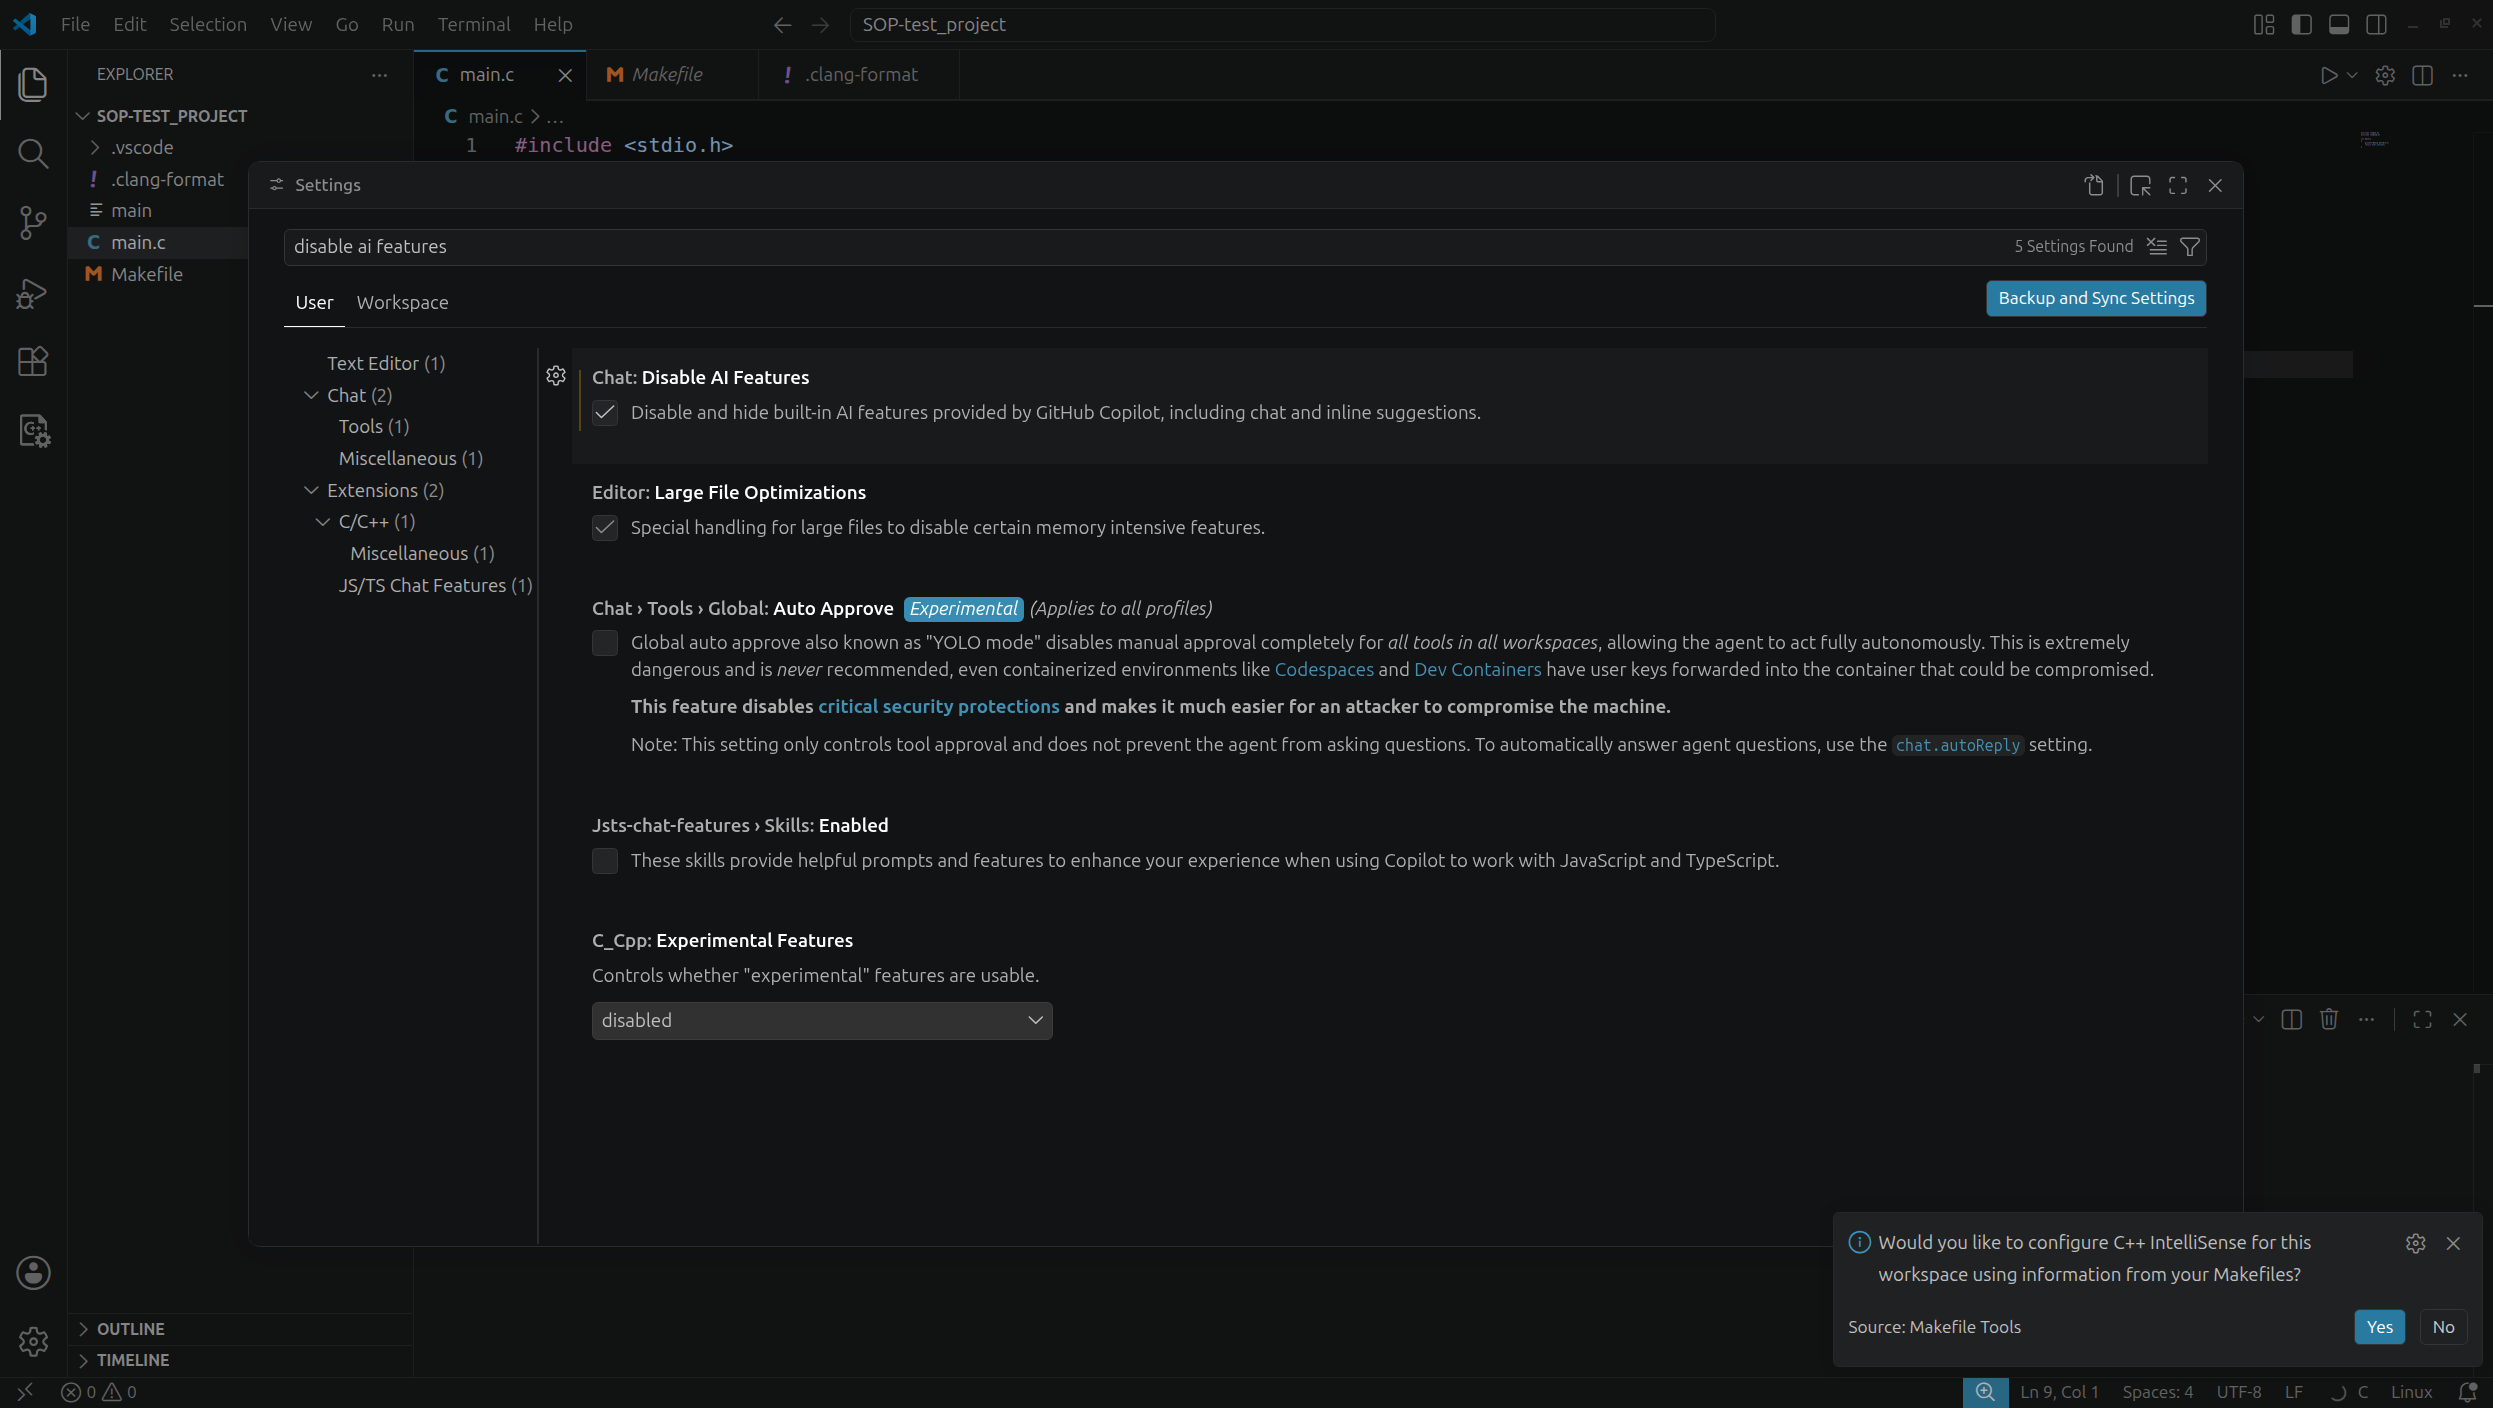
Note! It is necessary to ensure that no AI-assisted tools are active in the environment. In newer versions of VS Code, GitHub Copilot features are available built in, but using them requires activation and signing in. To be safe, they should be disabled. Installing additional extensions with AI agents is not allowed.
An easy way to disable AI-related features is to press Ctrl + ,, type disable ai features in the settings search bar, and then enable the Chat: Disable AI Features option, which sets chat.disableAIFeatures to true.
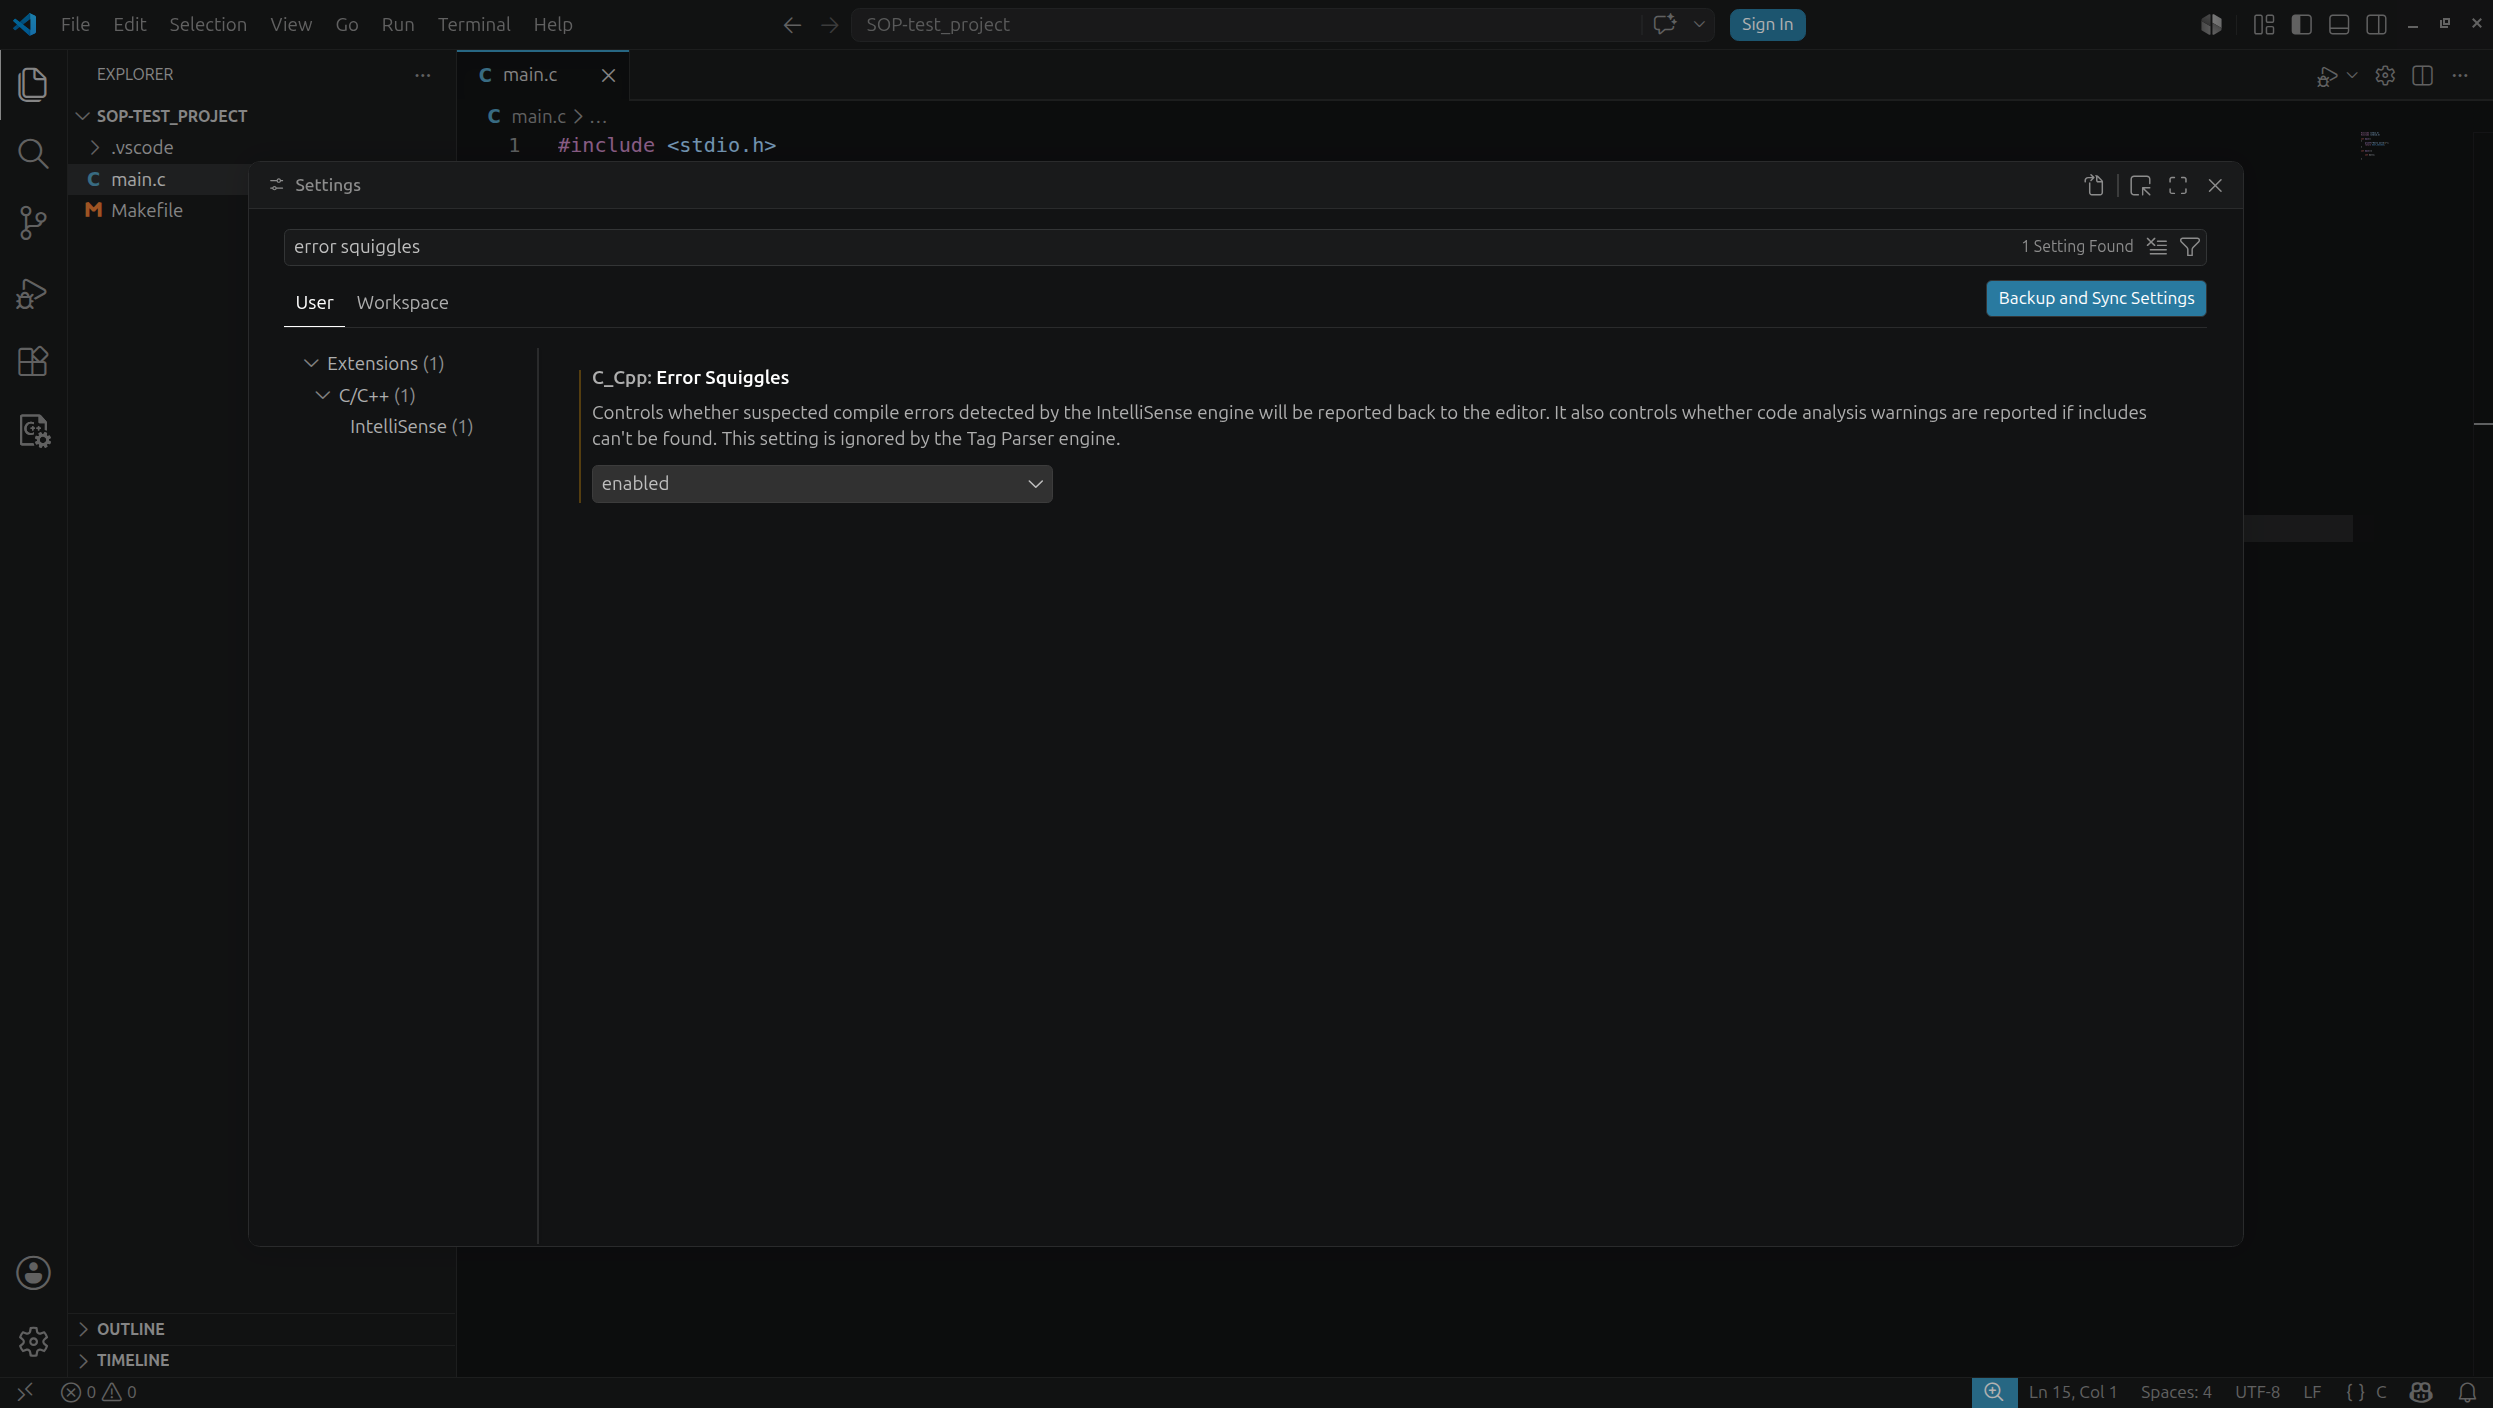
The next step is to enable error highlighting in the code. In theory, this option is enabled by default for the C language, but it often happens that, for some reason, it is disabled without any user intervention.
Press Ctrl + , (left Ctrl key and comma), then type error squiggles in the settings search bar and change the option to enabled.
Configure the IntelliSense engine in a similar way. Its default value should also be set to default, although this is not always the case. Press Ctrl + , and type IntelliSense engine. Set the value of C_Cpp.intelliSenseEngine to default.

The next step is to configure support for the Makefile, so that compilation uses the flags defined in it.
Press Ctrl + , and type configuration provider in the search bar. In the C_Cpp.default.configurationProvider field, enter the following value: ms-vscode.makefile-tools. This allows VS Code to automatically use the settings provided in the Makefile.
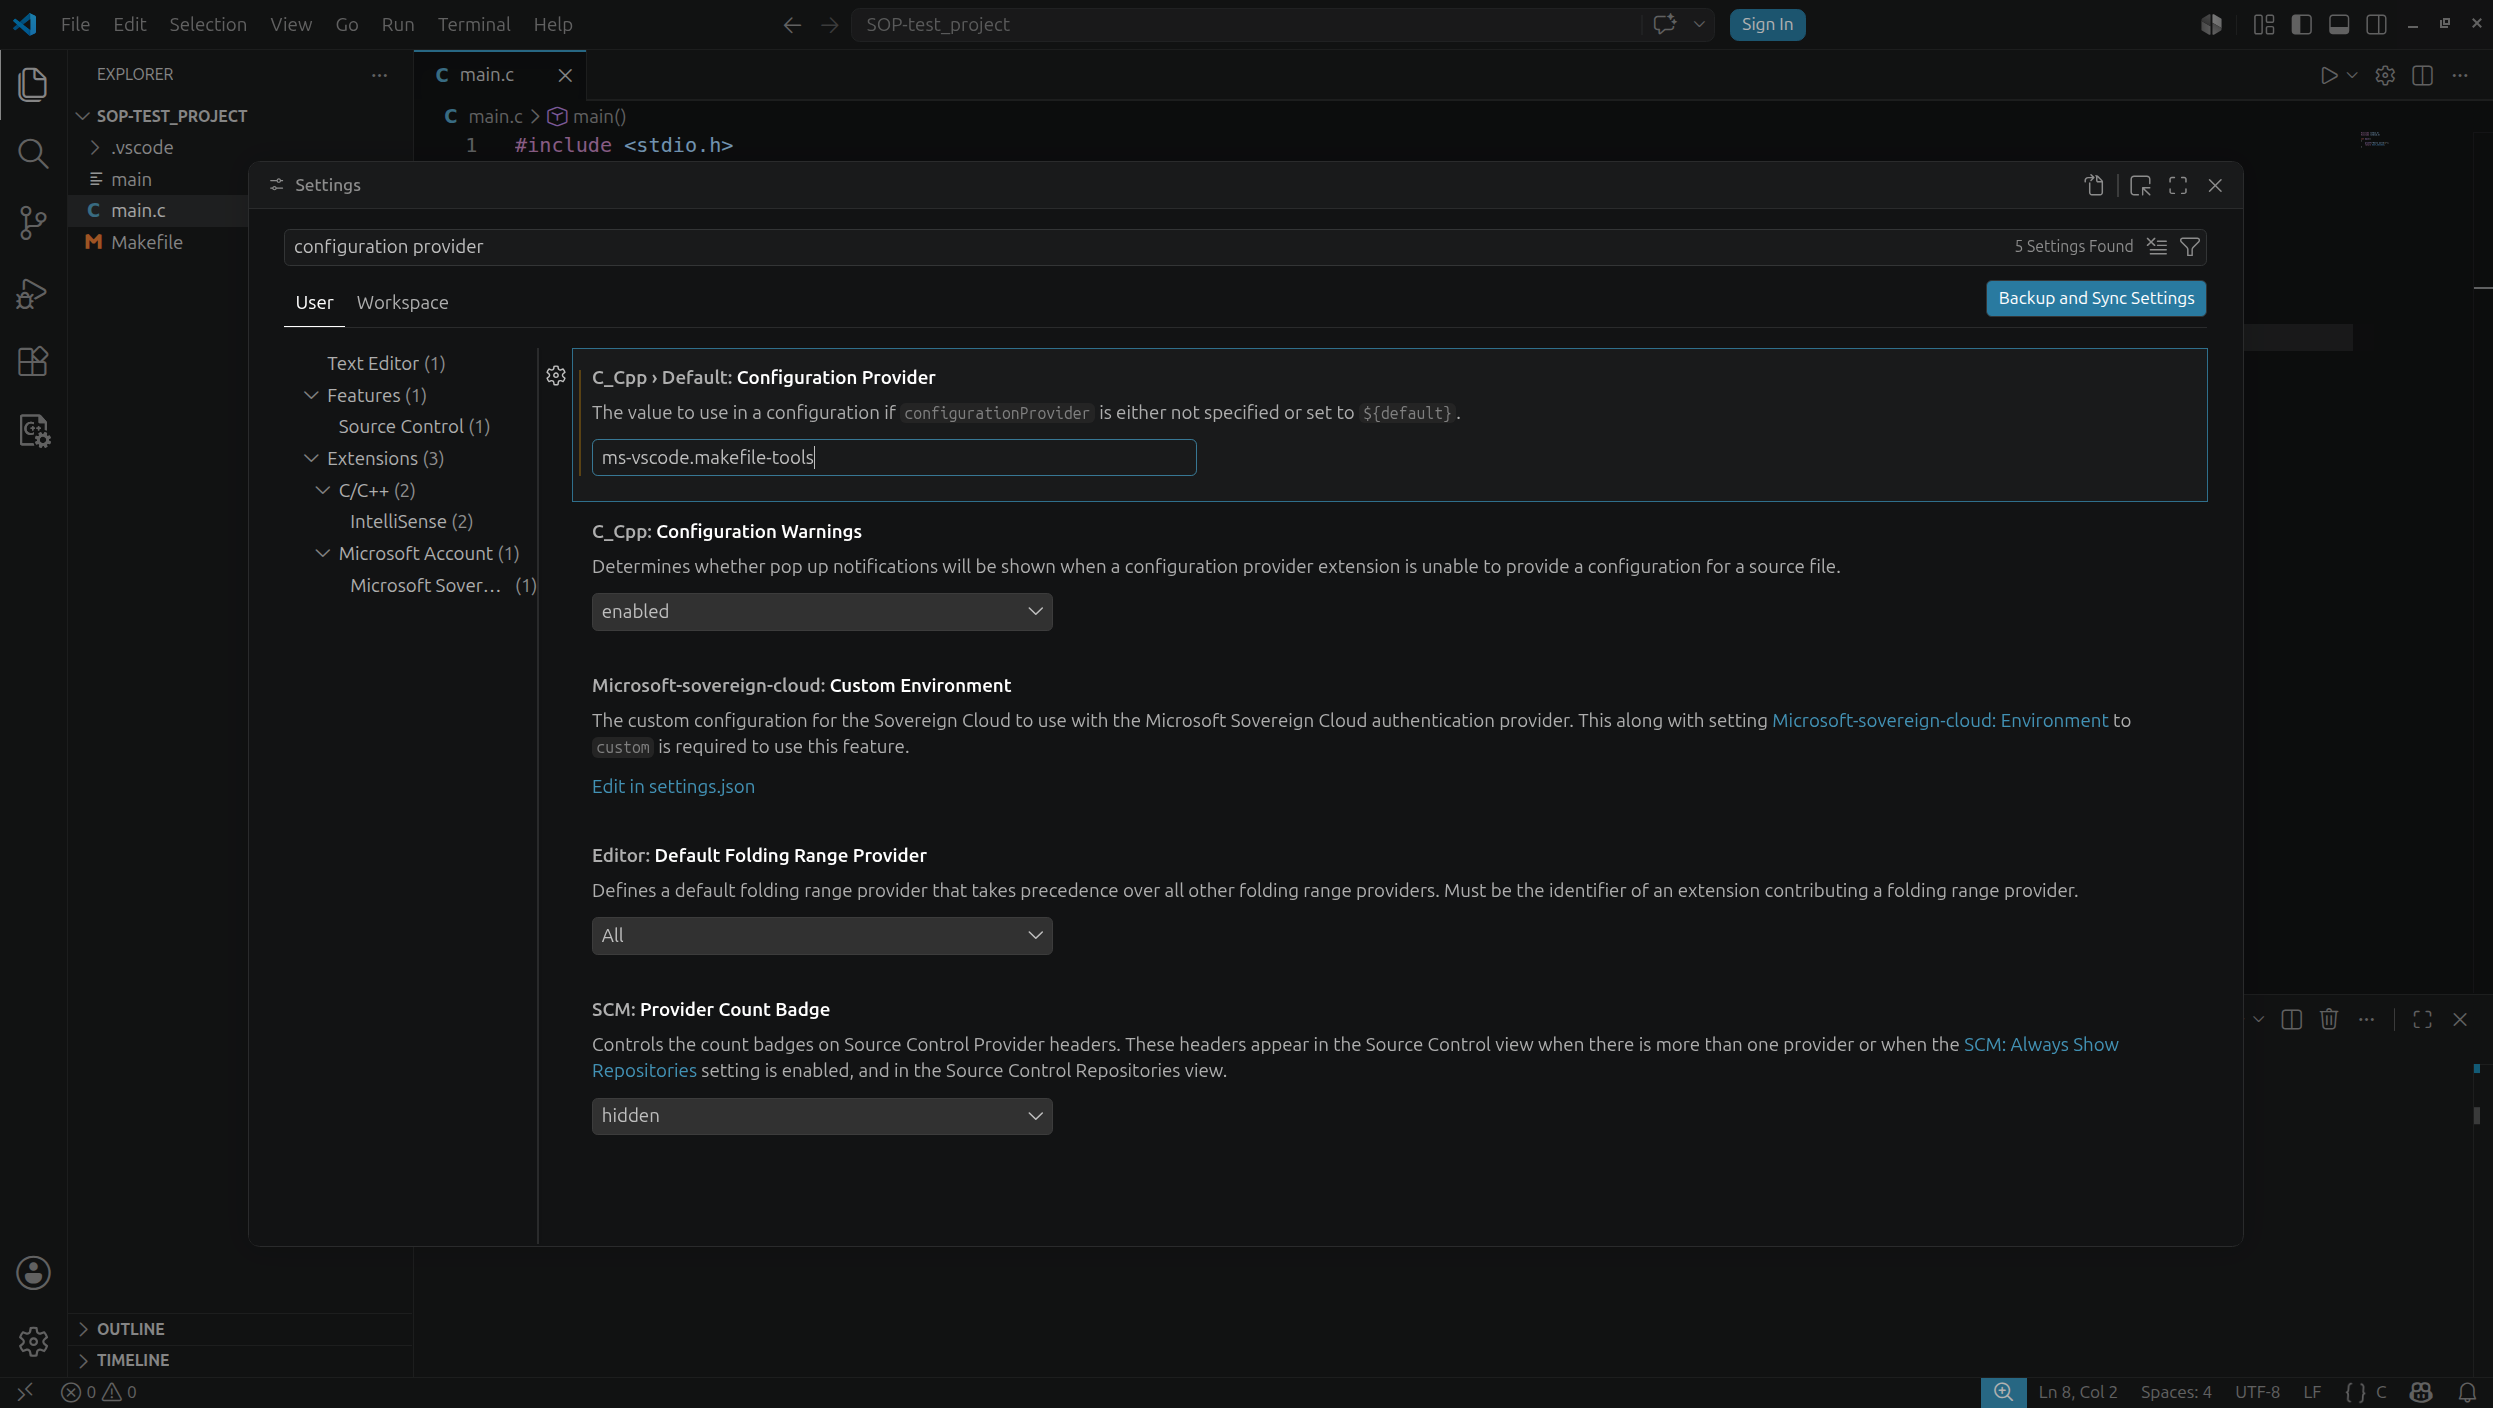
Next, with the project open, press Ctrl + Shift + P and run the Makefile: Configure command. This will automatically configure Makefile support in VS Code. Then press Ctrl + Shift + P again, run the Makefile: Set the target to be built by make command, and select all.
Next, we will configure an optional but very useful feature: automatic code formatting when saving C files. During the labs, our project will include the following .clang-format file.
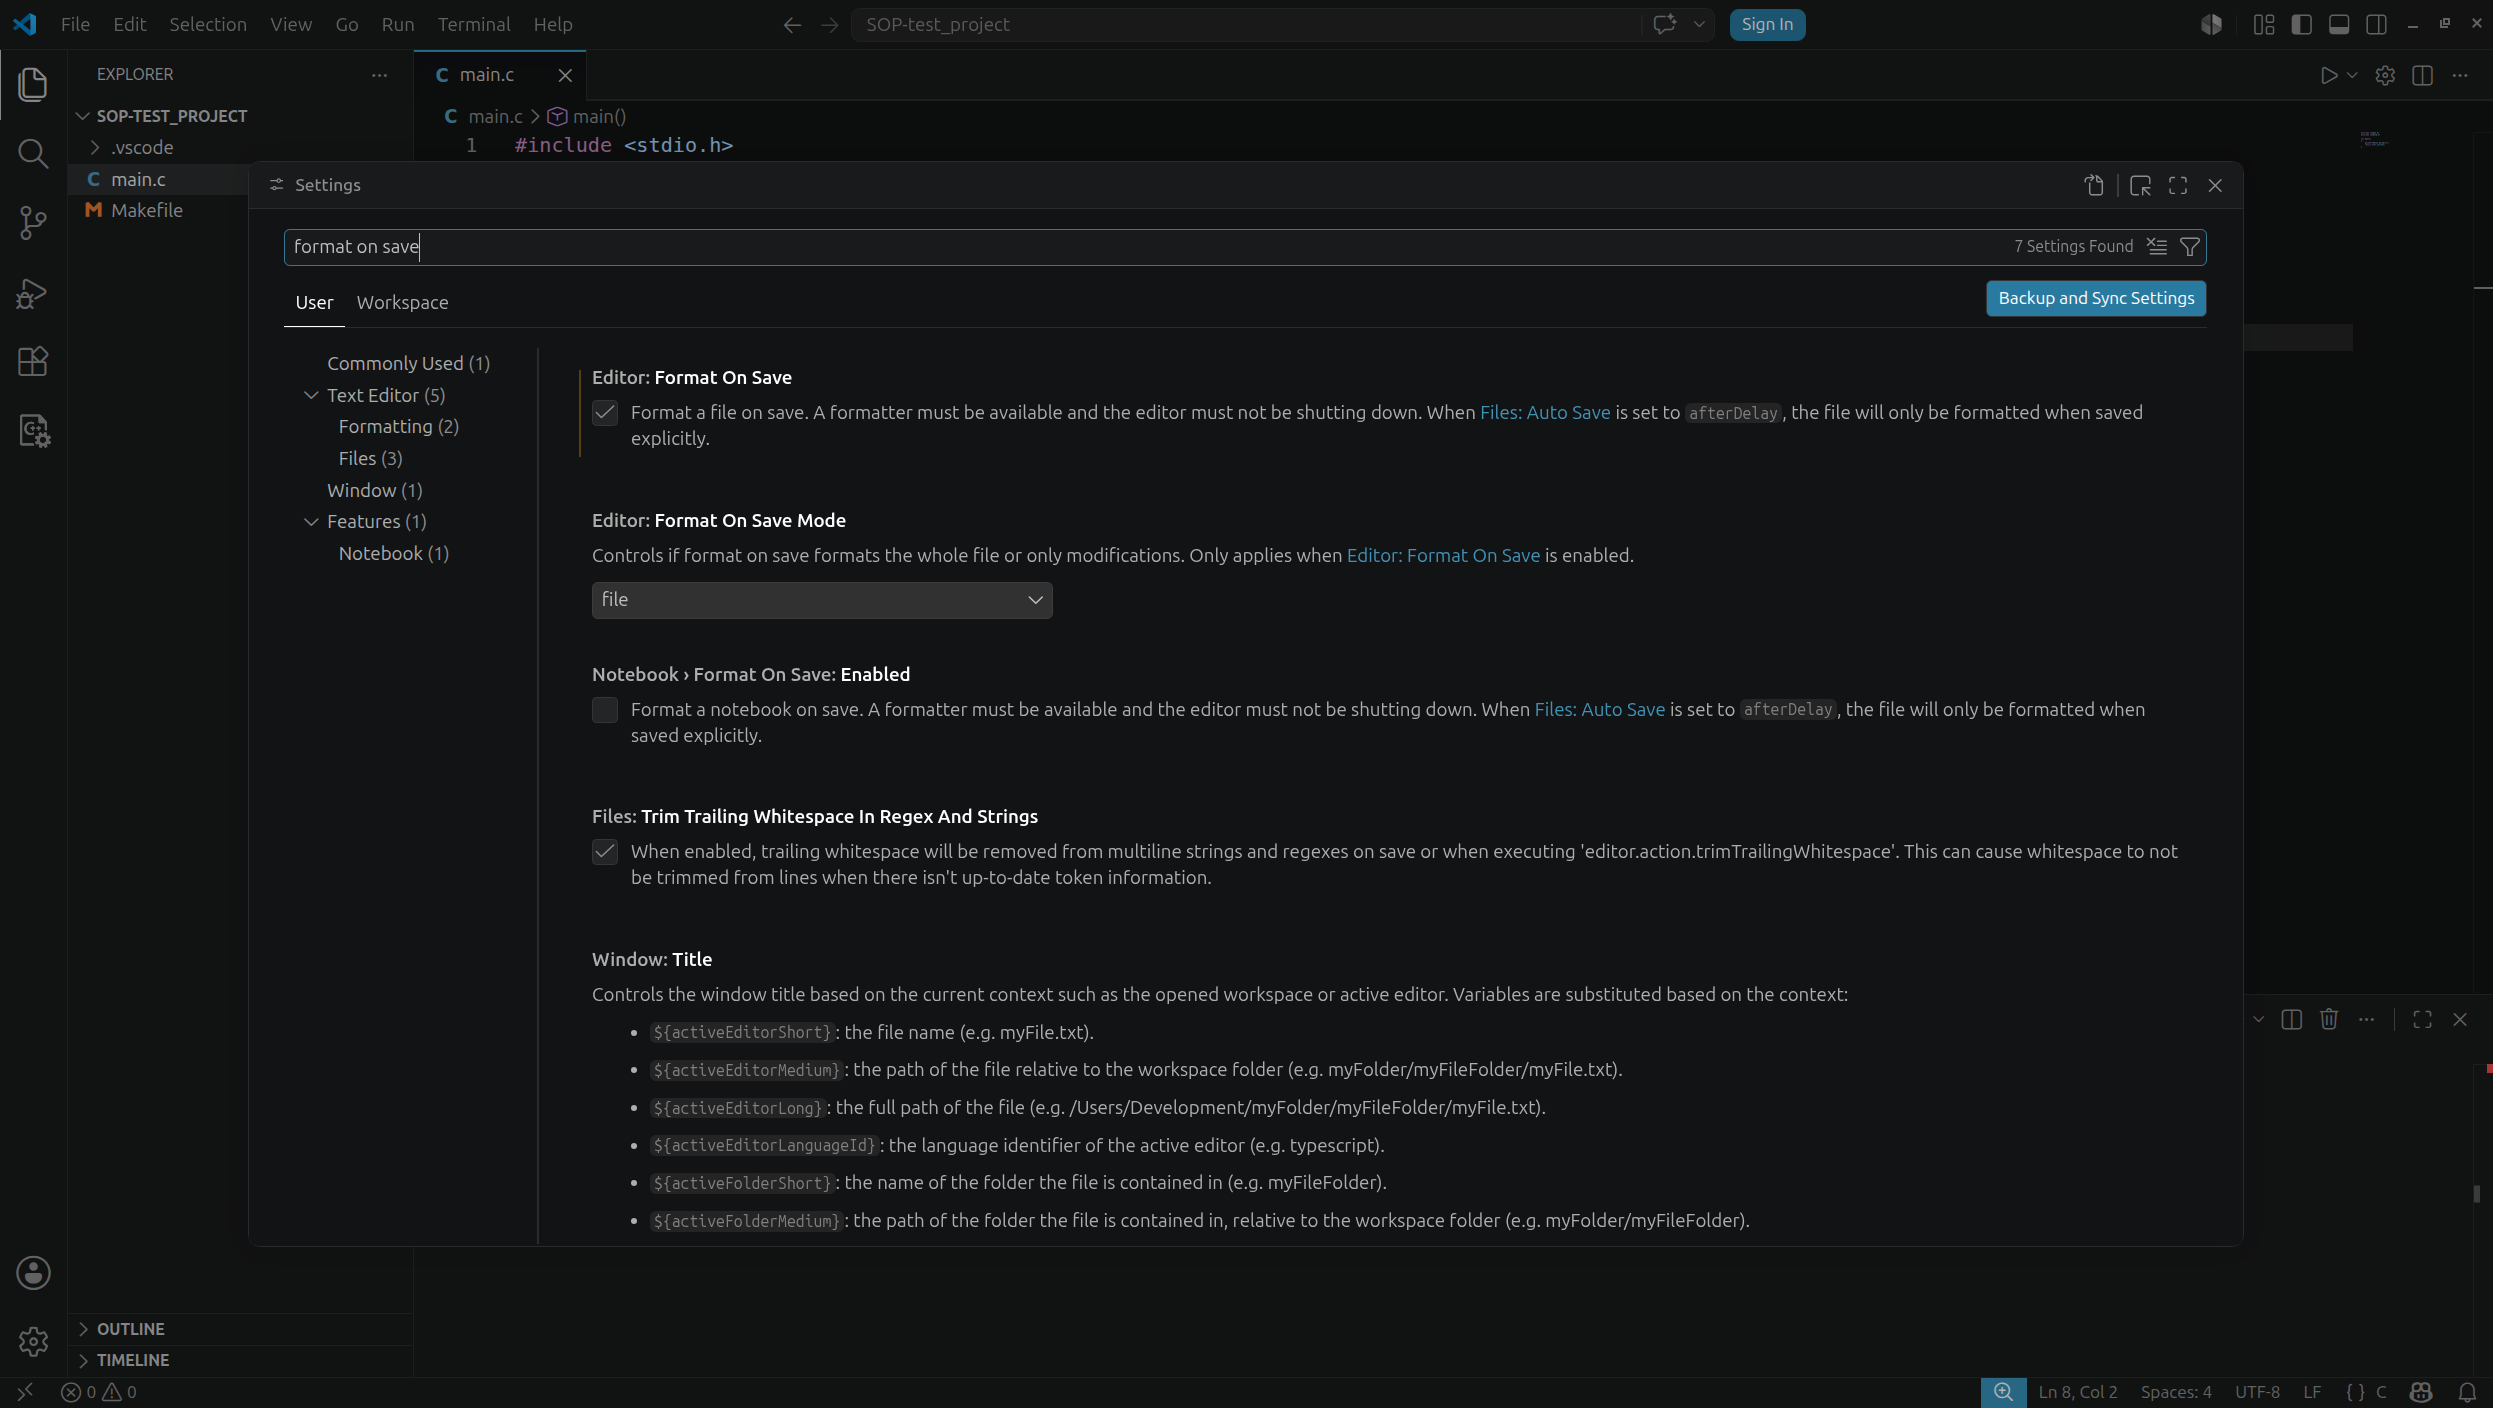
We want VS Code to use the above file as the formatting configuration. First, enable code formatting on save: press Ctrl + ,, type format on save in the search bar, and enable the Format on File save option.
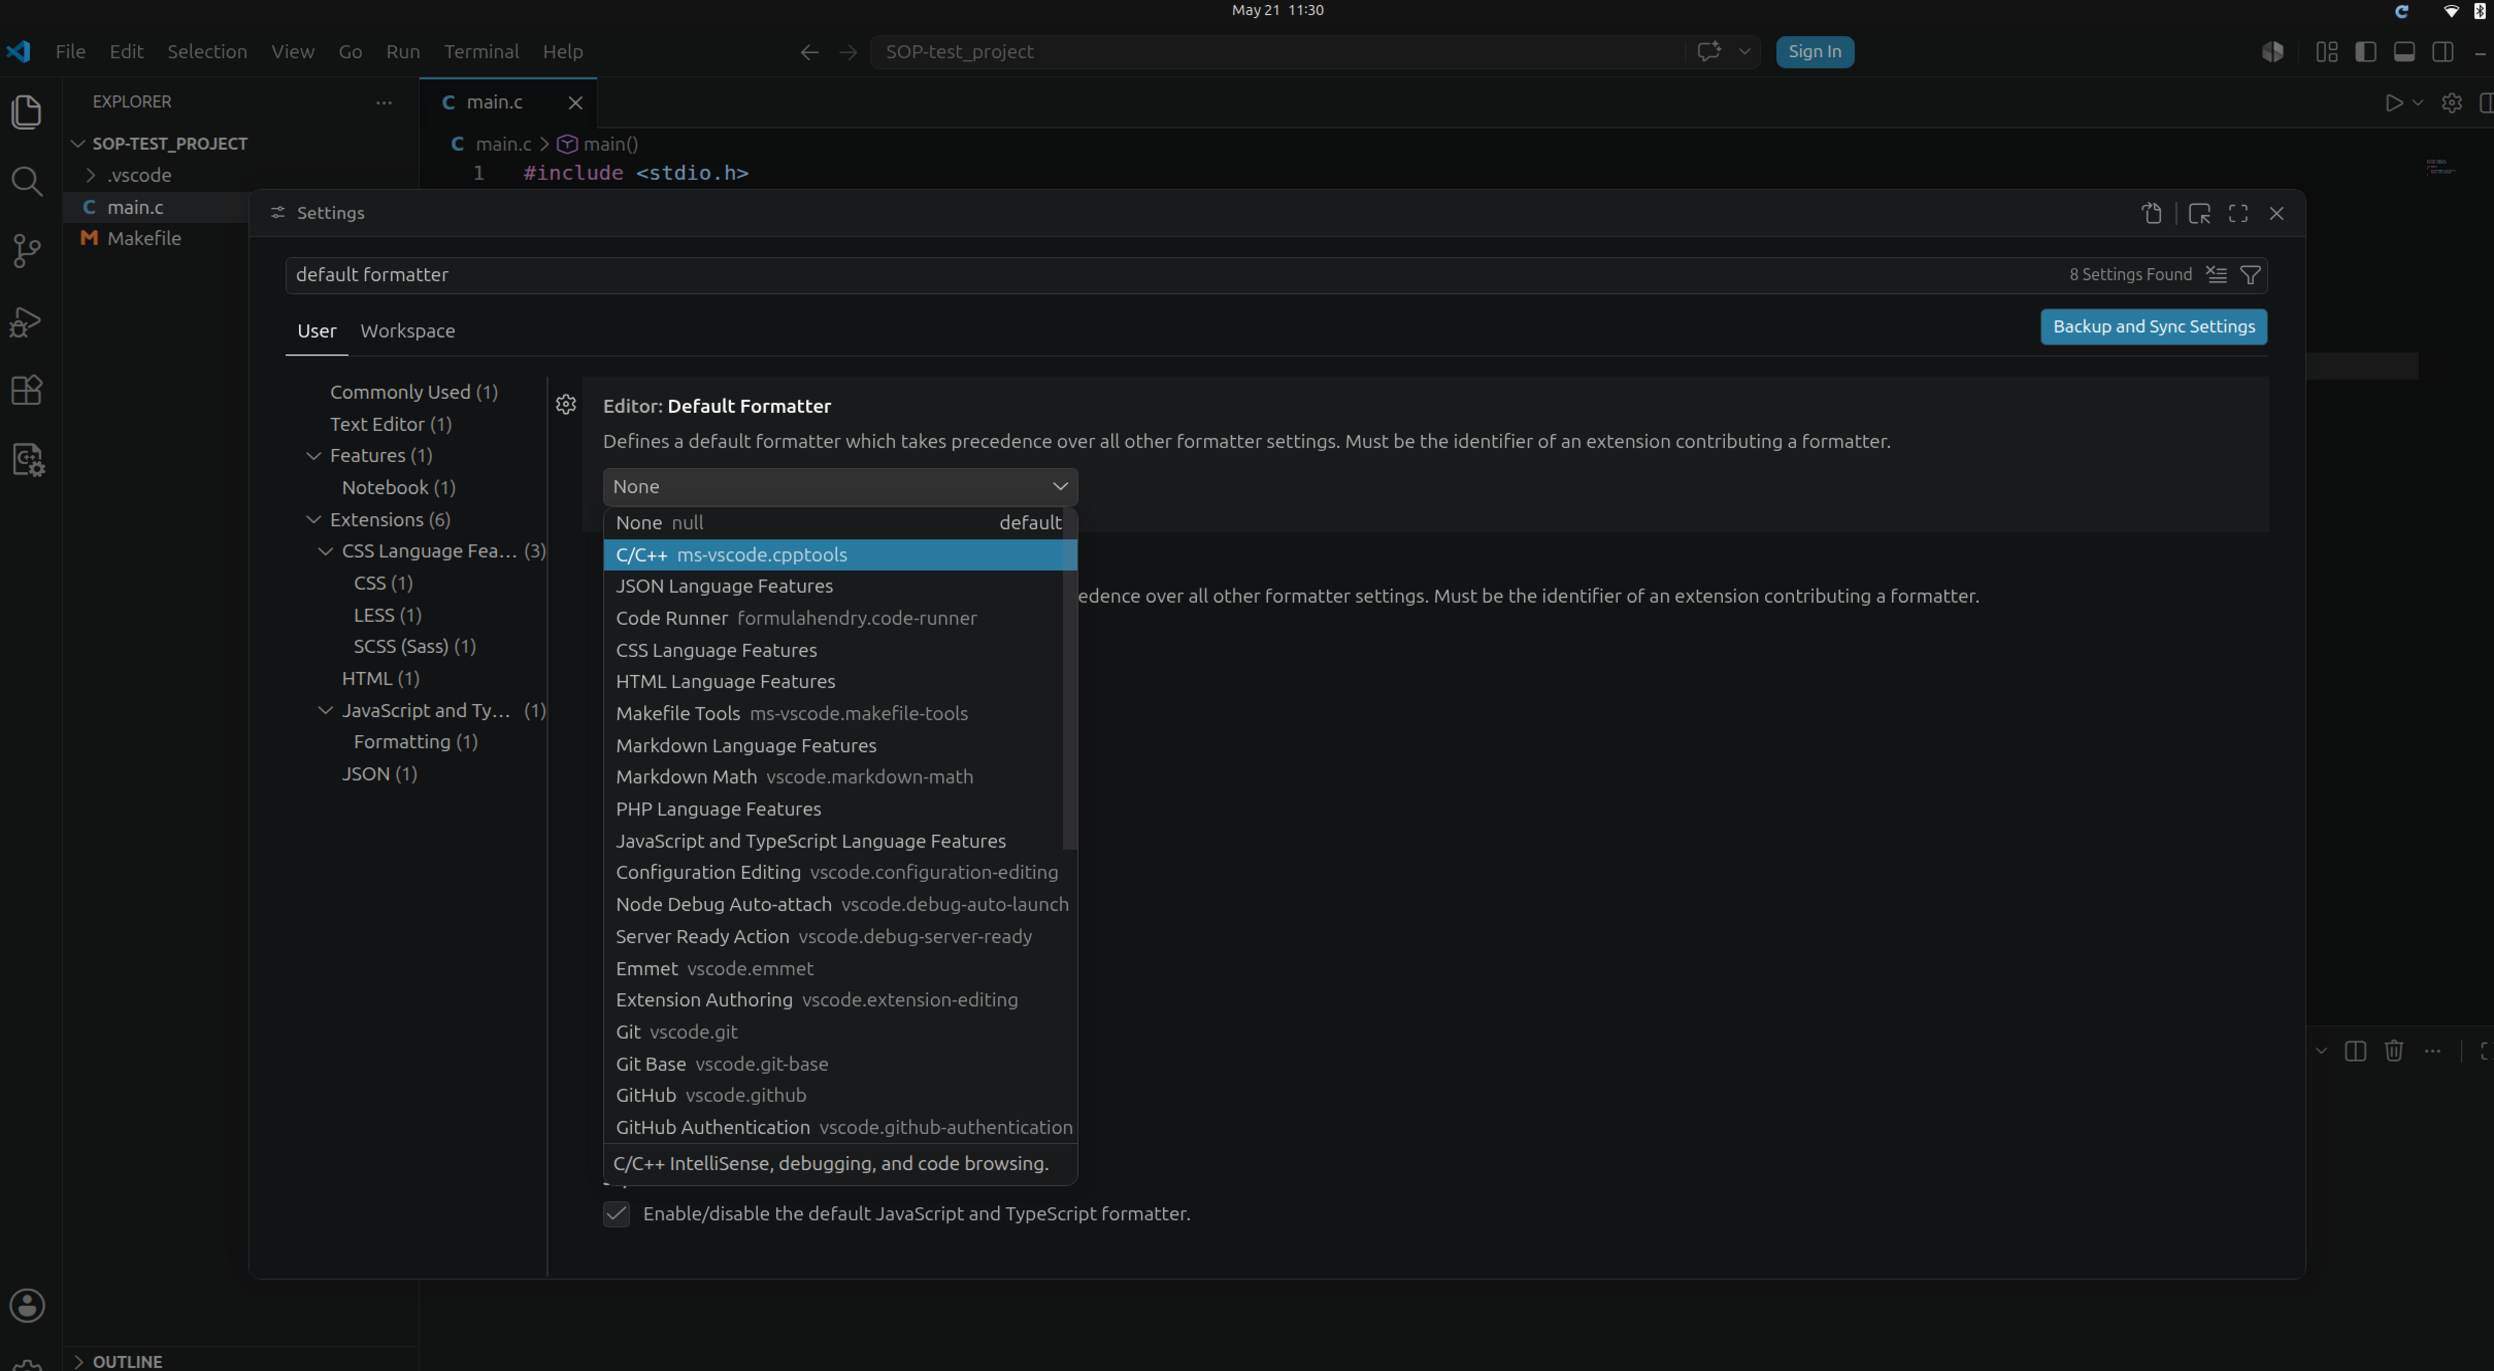
Next, search for default formatter and, in the Default Formatter setting, select C/C++ ms-vscode.cpptools.
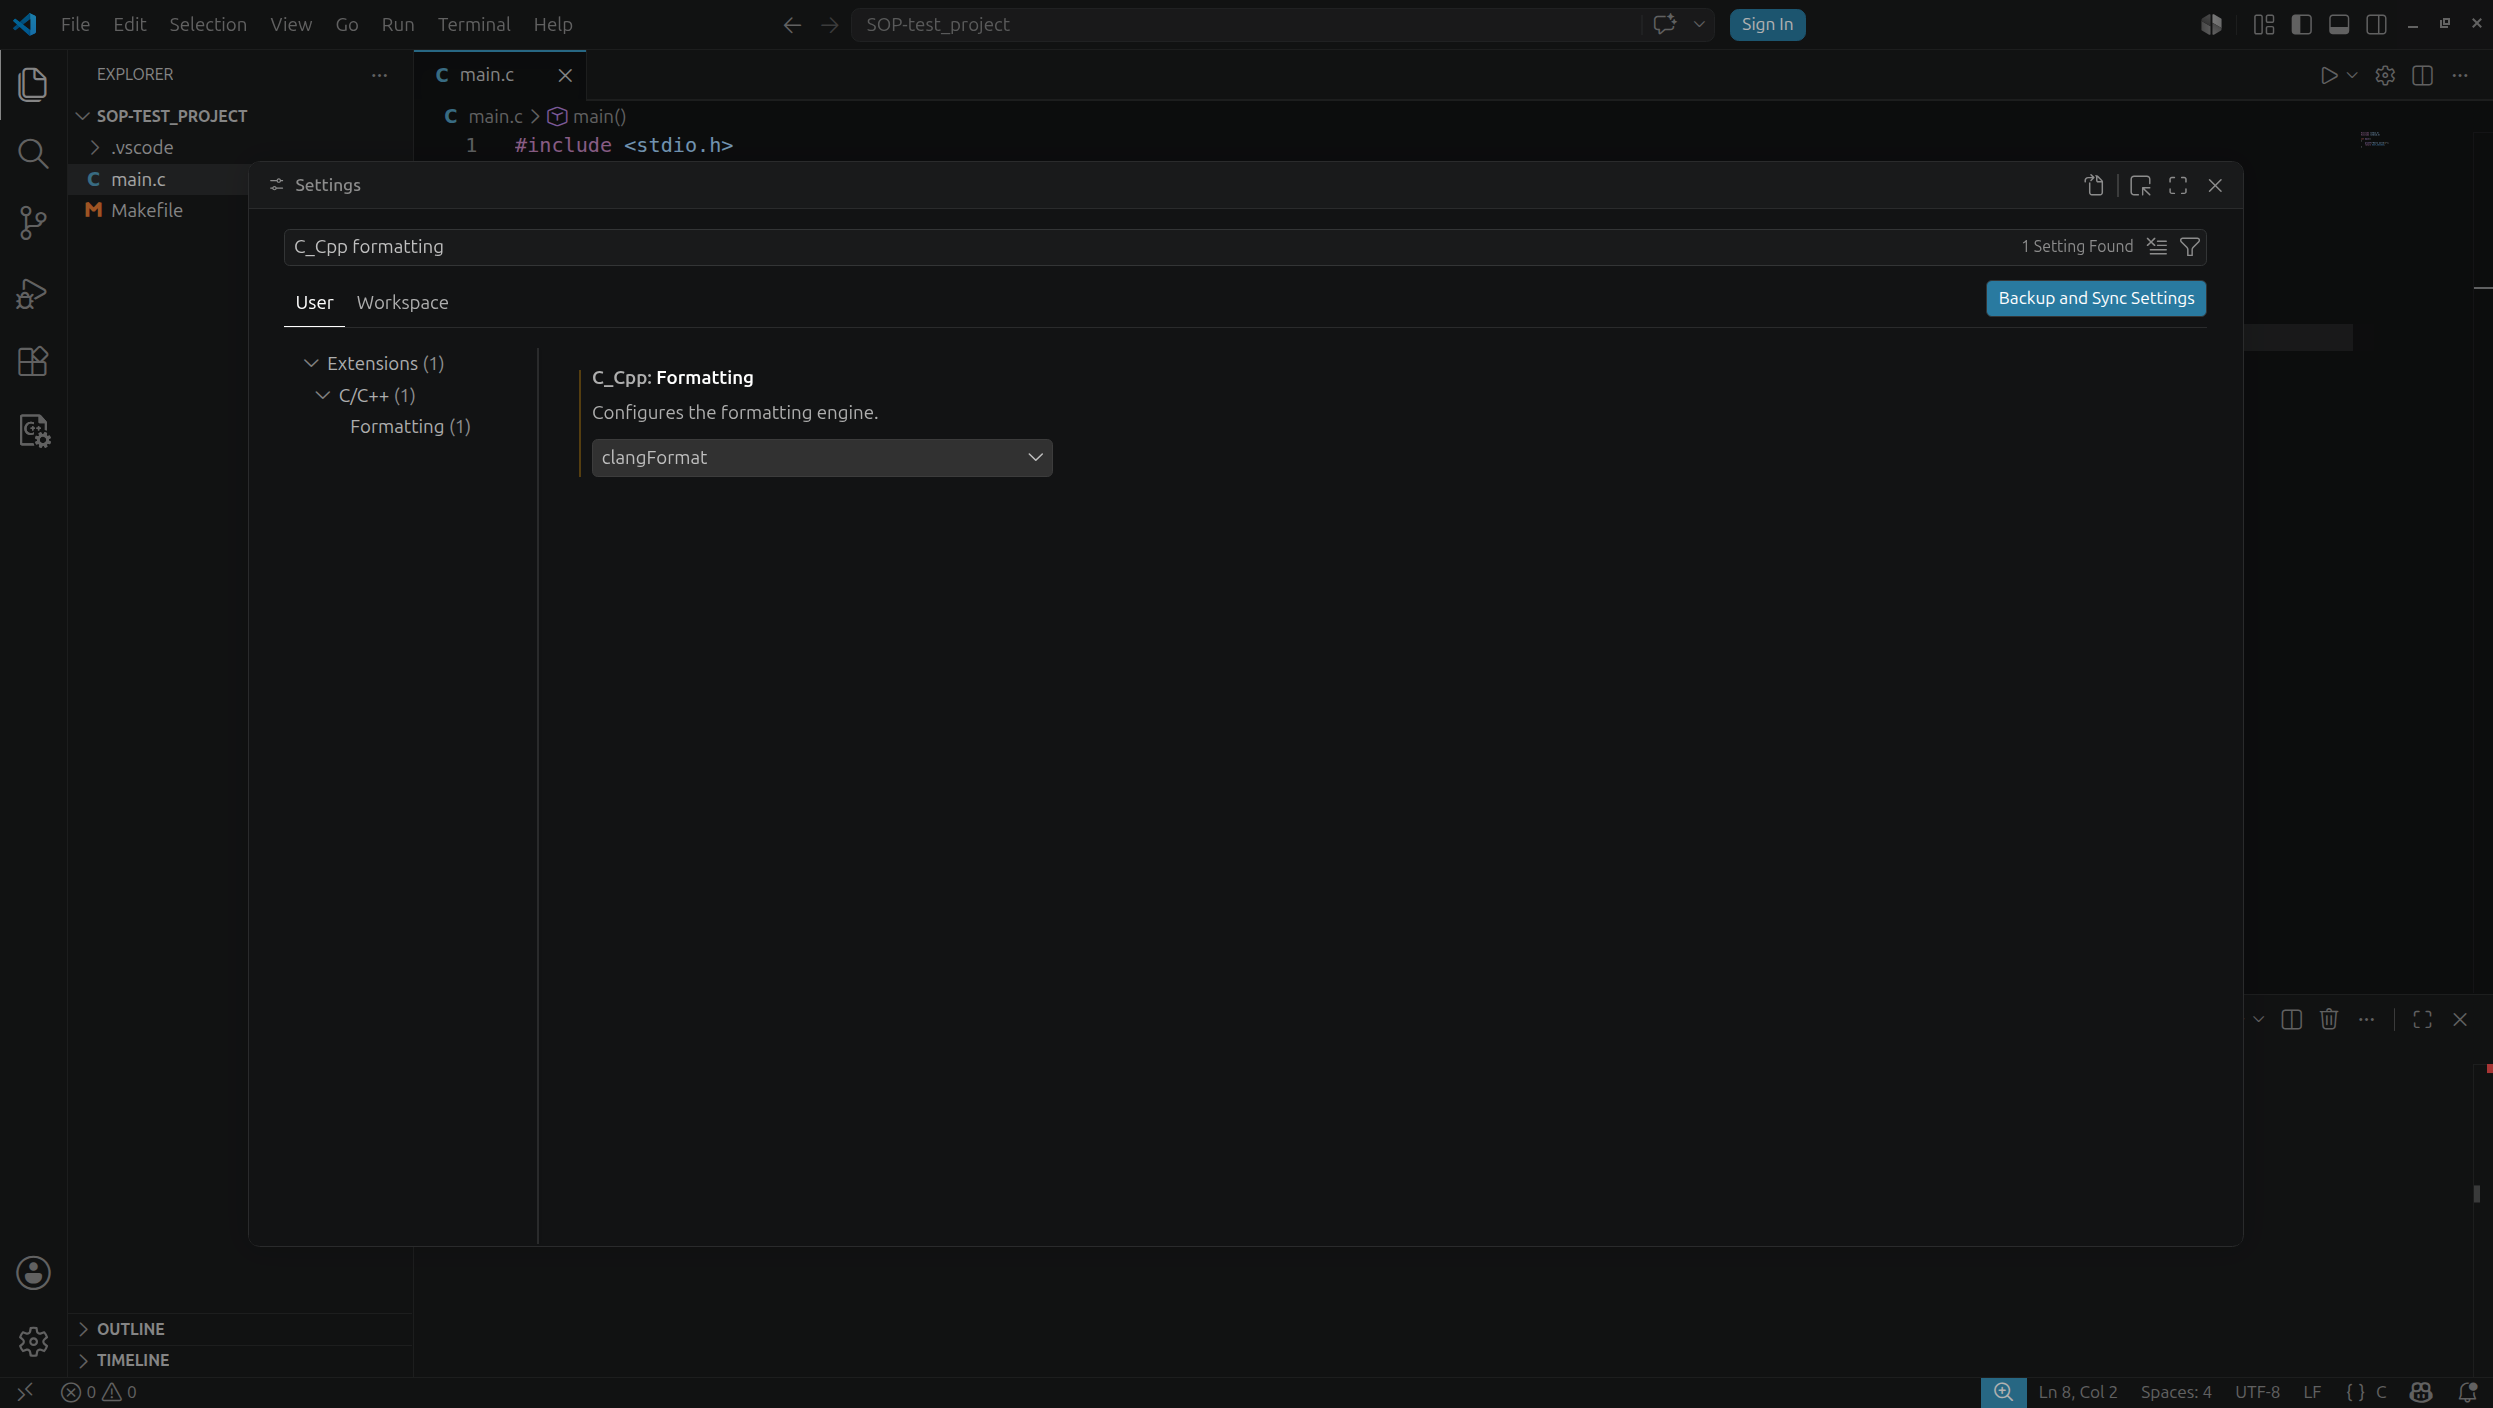
Then search for C_Cpp formatting and change the C_Cpp: Formatting setting to clangformat.
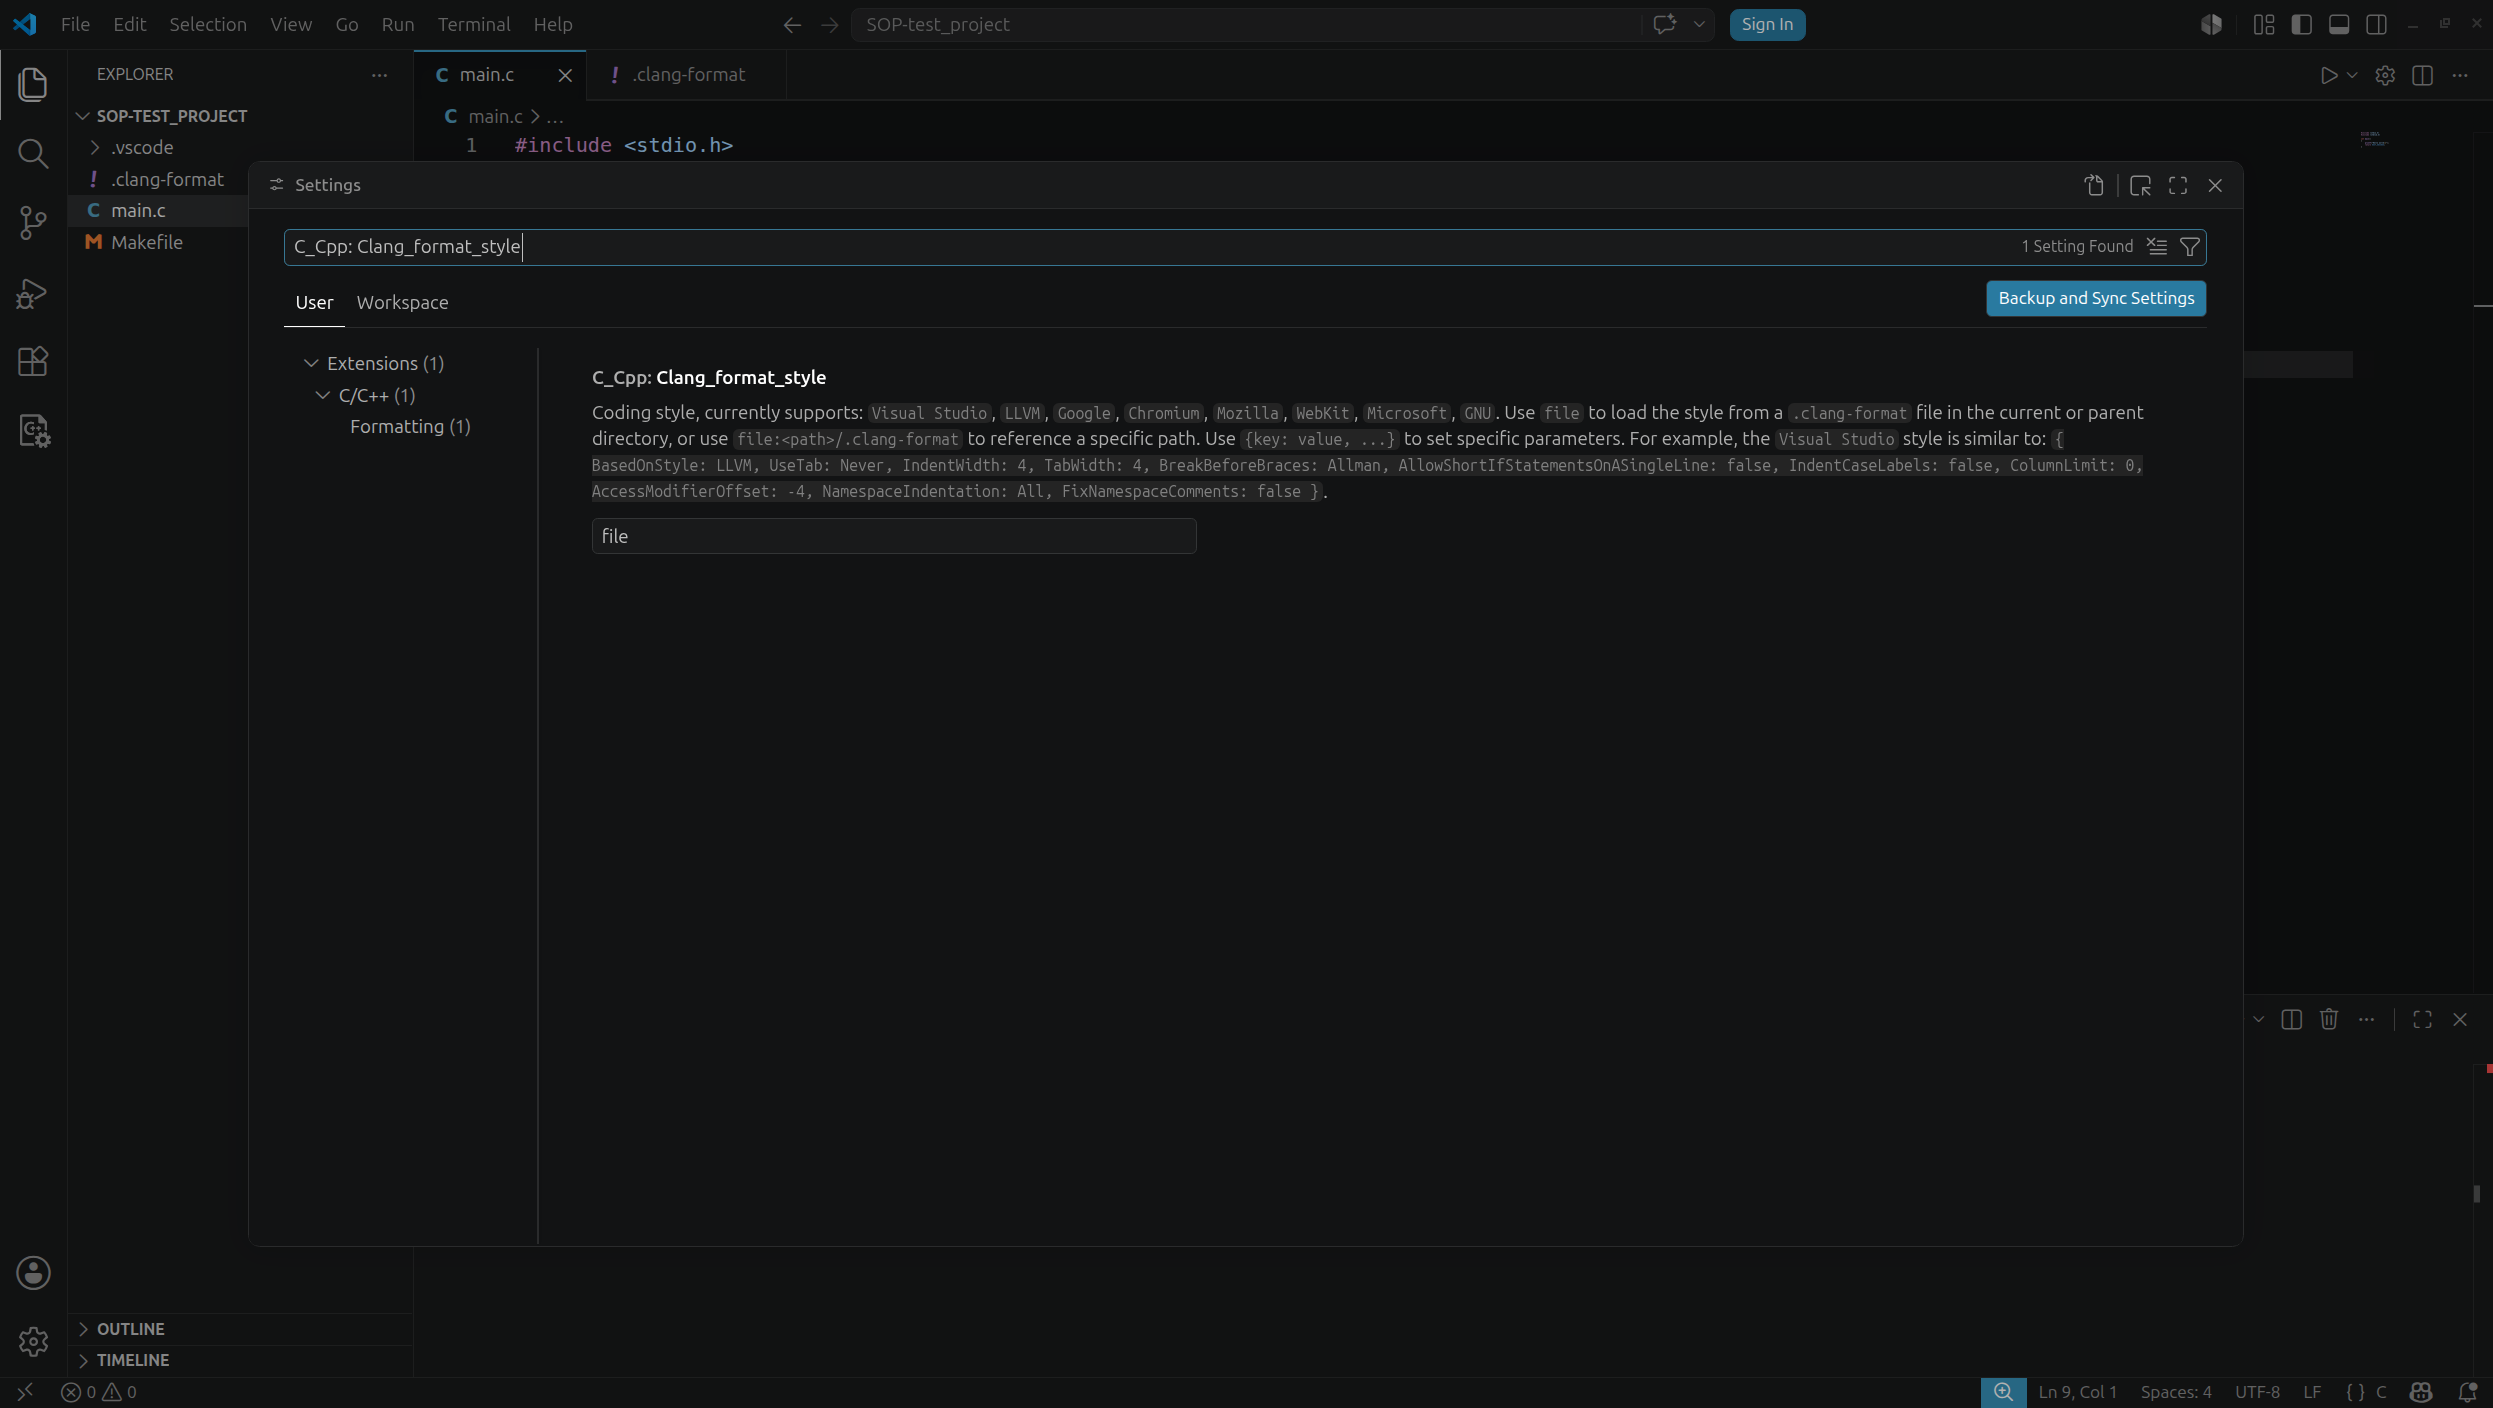
Finally, make sure that the C_Cpp: Clang_format_style option (available through the search bar) is set to file. This should be the default value. Thanks to this setting, VS Code will use the formatting options defined in the .clang-format file.
These are all the steps needed to make formatting run automatically when saving a file. This will speed up our work and make completing laboratory tasks much easier.
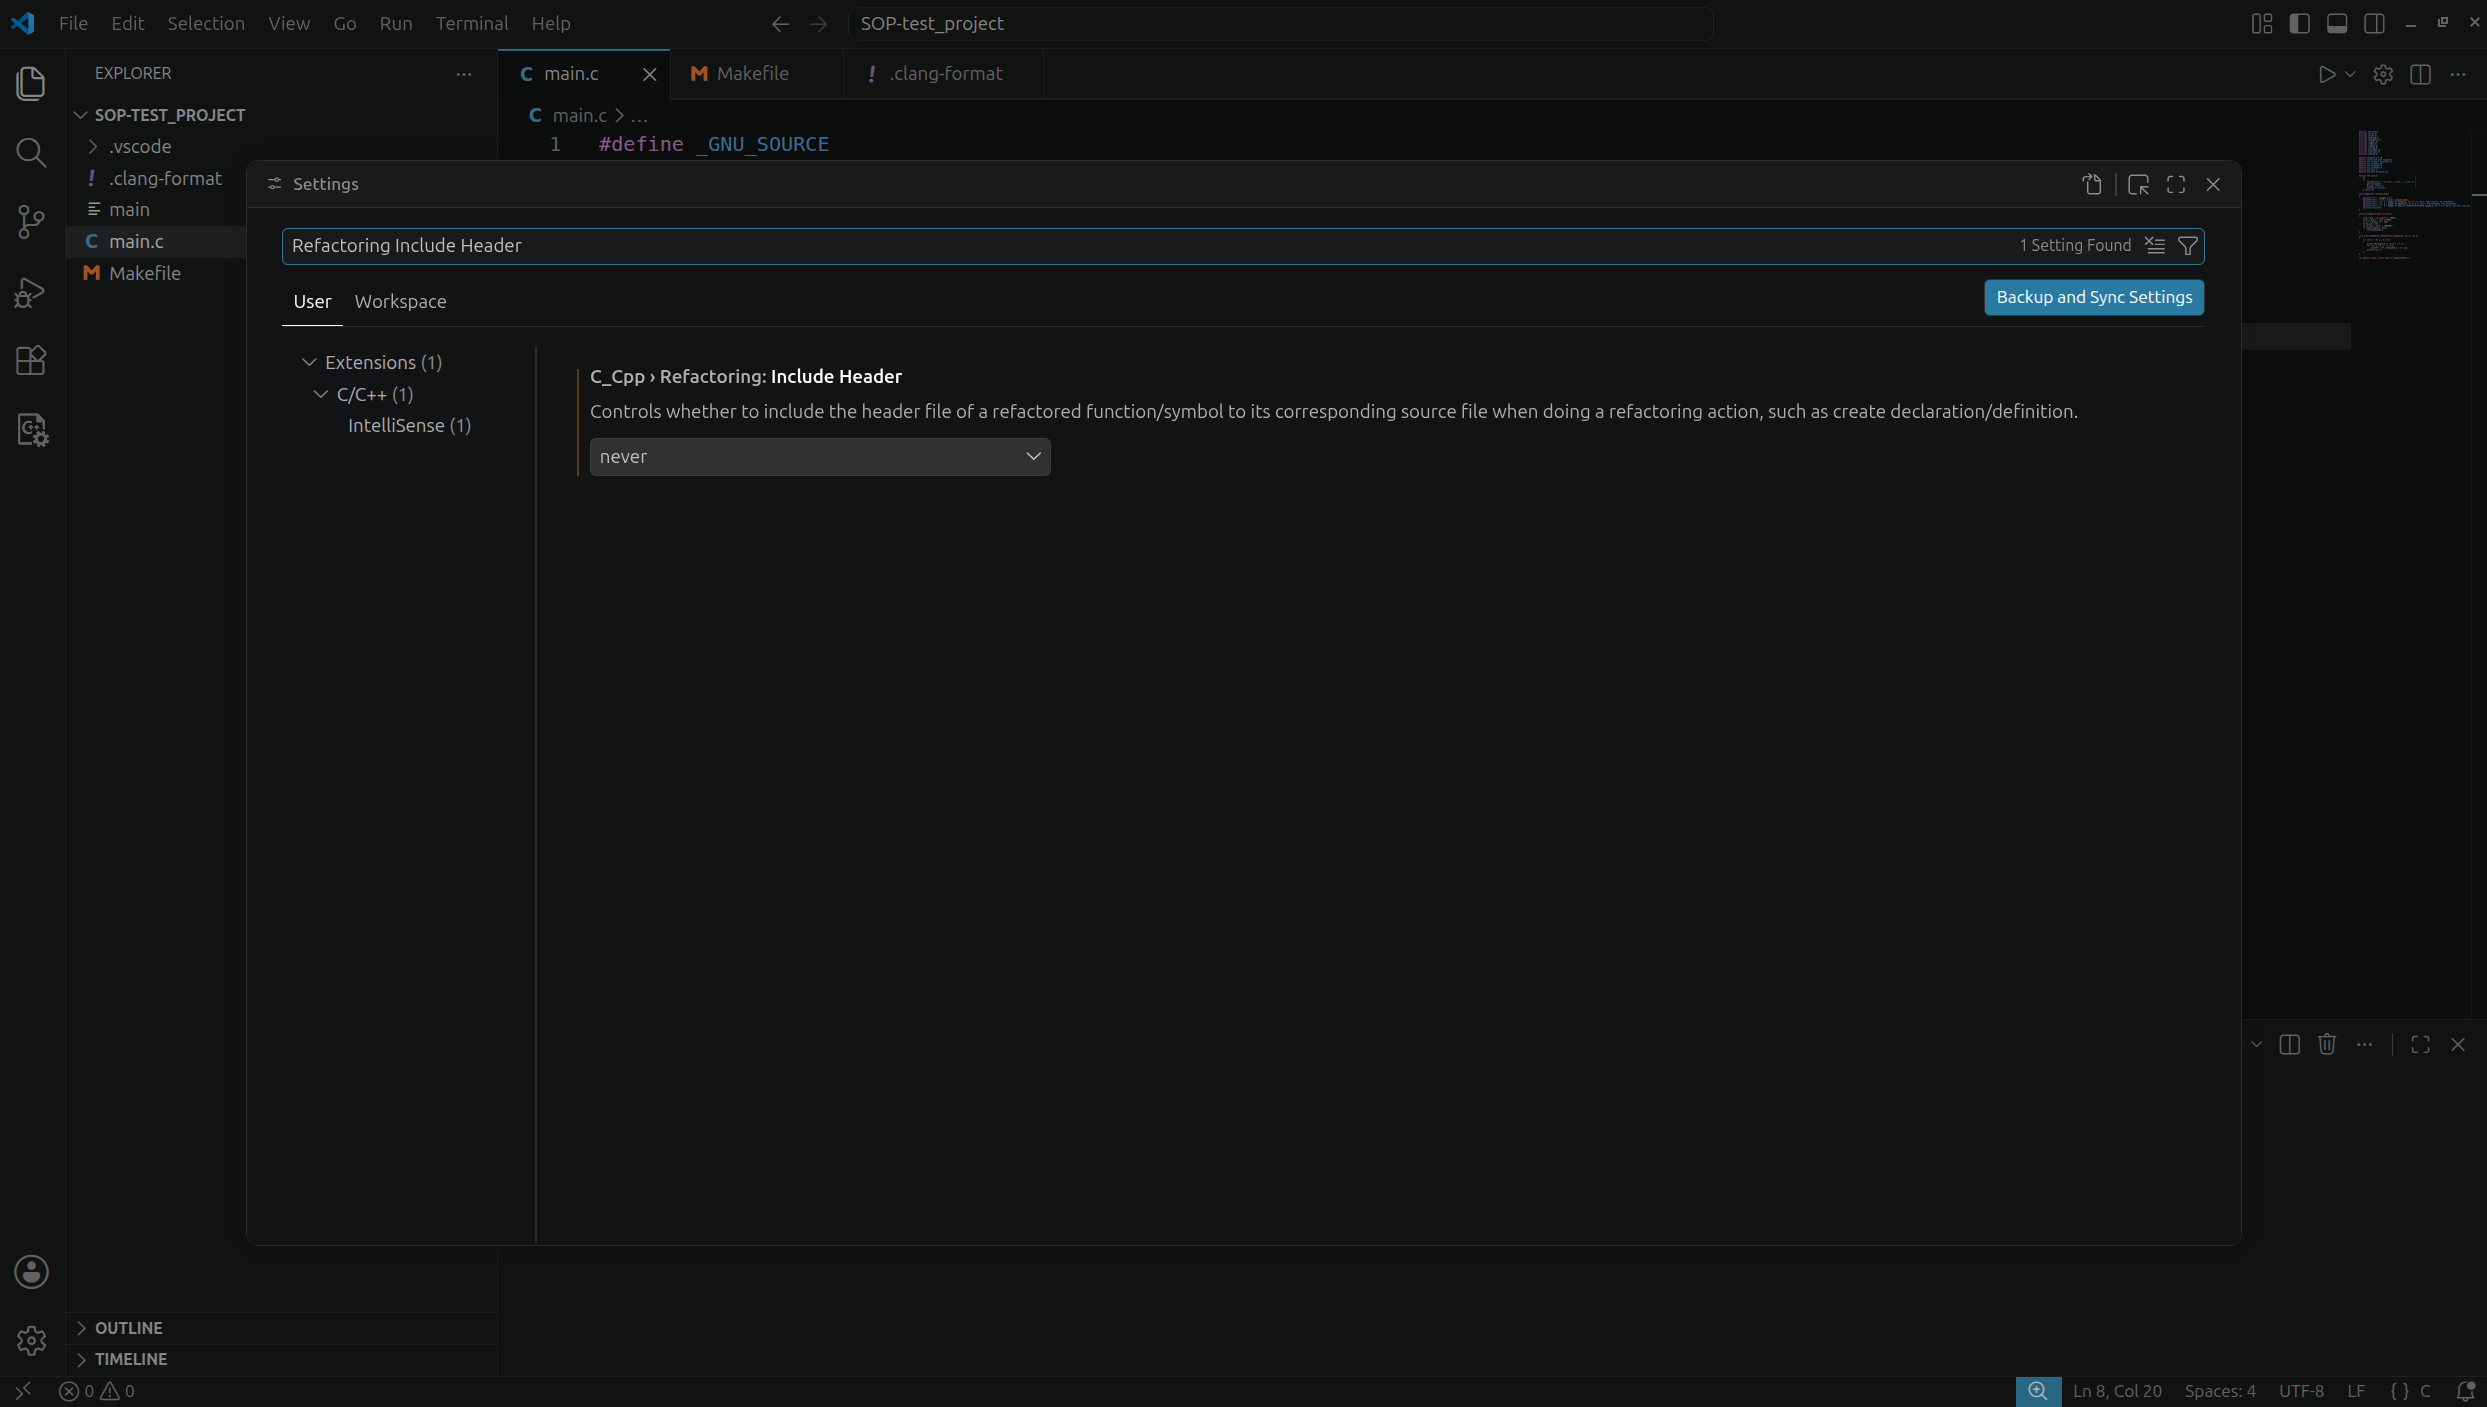
A rather problematic editor feature may be the automatic insertion of #include directives into .c files. This can cause significant issues during laboratory classes. To disable it, press Ctrl + ,, type Refactoring Include Header, and set the Include Header option to never. VS Code should now no longer automatically add unnecessary #include directives to .c source files.
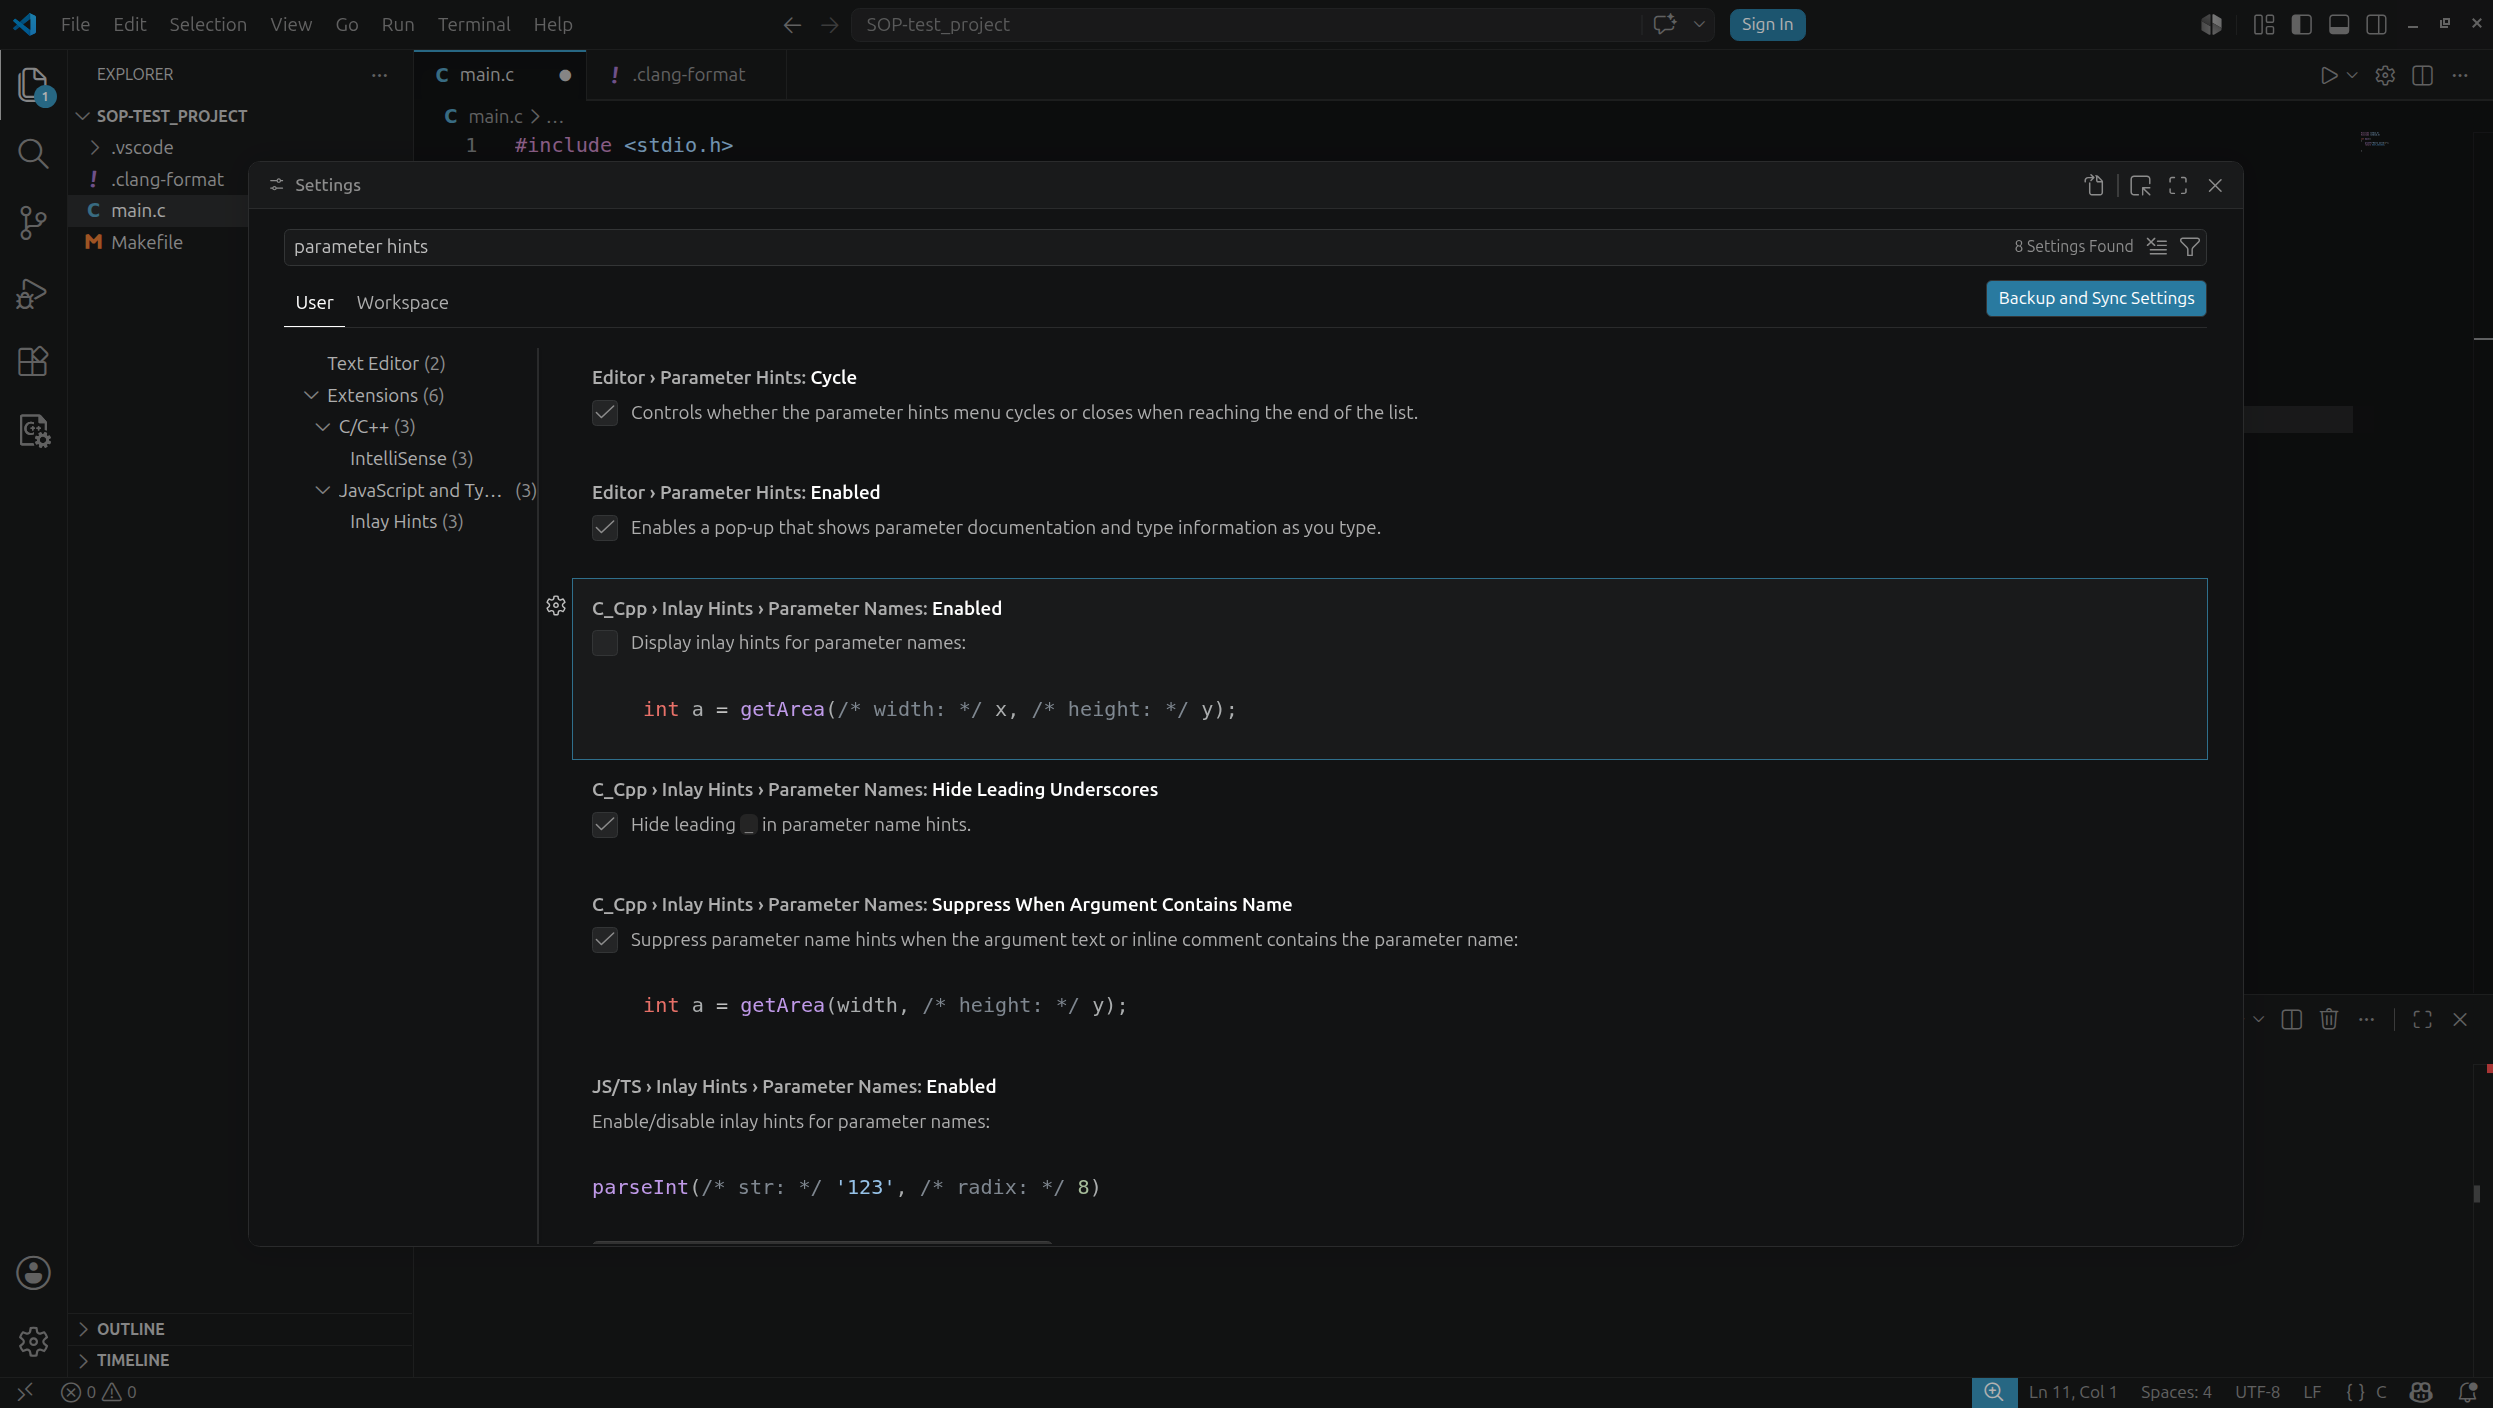
As the final step, let us take care of hints and autocompletion. Most hint and autocompletion options should already be active, but we can verify this by pressing Ctrl + , and searching for parameter hints. It is recommended to apply the settings shown in the screenshot below:
After completing the steps described above, Visual Studio Code should be ready for use during the labs. However, it is worth spending a moment getting familiar with a few additional editor features, because VS Code is a very flexible and highly customizable environment. The command palette, available under Ctrl + Shift + P, is especially useful because it allows you to run most editor functions without looking for them in the menu. It is also worth exploring the extensions panel, code formatting settings, and the integrated terminal, which can be opened with Ctrl + ,. More options and configuration examples can be found in the Visual Studio Code documentation.